
Registration process
Steps in a registration process
A registration process will always follow this order:
Main steps |
|---|
|
|
|
|
|
|
Extra optional steps are possible between step 4 and 5, in the following order:
Extra steps in between step 3 and 4. | More information |
|---|---|
Phone number input and verification | |
Combined transports | |
Certified Person | |
Scan the necessary documents | |
Complete the asset management kiosk flow |
Extra steps after step 5 | More information |
|---|---|
Weighing |
1. Language selection
A kiosk process always start with choosing a language.
If you click the home button during the registration process, you are redirected to this page.

Kiosk - Homepage
Note: A translation/language flag is only displayed if translations are completed in the kiosk configuration (Welcome text)
2. Profile selection
After language selection, all profiles associated to kiosk will be shown as available profiles for registration. By limiting the available profiles, you can enforce your visitors to enter your site using a specific entrance.
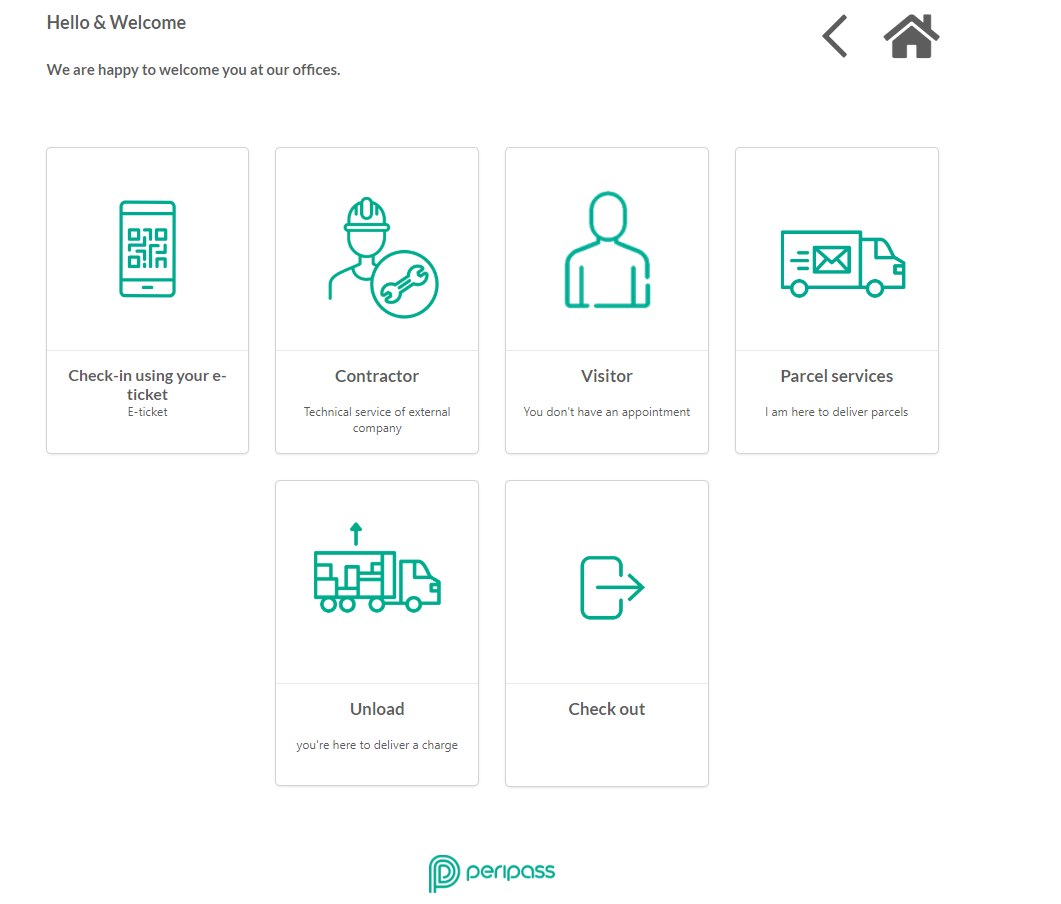
Kiosk Profile/Flow selection
Different kiosks can be used for different registration process. Above we see a kiosk where you can have 4 different profiles registration (Contractor, Visitor, Parcel services and Unload), e-ticket registration (QR-code) and also check-out procedure.
Tip: Make sure you provide sufficient signage and clear directions. You want to avoid visitors to end up in the wrong place, since this will cause frustration.
Profile redirection
If profile redirection is enabled on kiosk configuration, Peripass will automatically redirect visitor to the correct profile if a wrong has been selected during registration.
E.g.: A visitor selects the profile Outbound but provides an Inbound visitor reference. Peripass will redirect registration as an Inbound registration.
E-ticket
E-ticket is reserved for all profiles that use an E-ticket. For these profiles it is not necessary to select the correct profile. Al subsequent steps (4 > 6) will be executed for the identified visitor and profile. More information on E-tickets: E-ticket
3. Visitor identification and approval
Before granting access to a visitor that arrives at your gates, you want to verify the registration. There are a couple ways to achieve this verification.
Pre-registered visitors → Automatic approval | Ad hoc visitor → Manual approval |
|---|---|
Visitors that register with a pre-registered E-ticket or reference are approved automatically. During registration known data can be pre-filled to speed up the registration. When the reference is not recognised found in the system, there are 2 options:
| Visitors that register ad hoc should still be approved manually after registration. 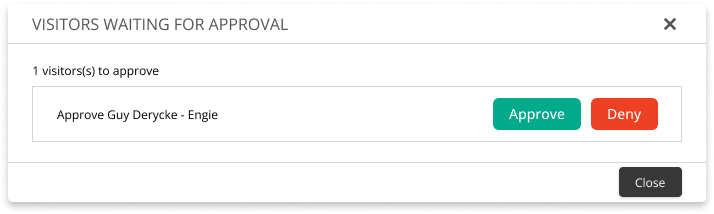 |
Tip: Doubting which flow is best for you? Read more here: Advantages & disadvantages of pre-registration
Tip: check these extra features to increase registration success: 3 features to simplify registration with references
Reference not recognised
If automatic approval is enabled for a profile, visitor will be notified if he enters an invalid/unknown reference.
Deny registration → show error | Fallback to ad hoc visitor flow → show warning |
|---|---|
If Manual approval fallback is not enabled, visitors without reference are not allowed. 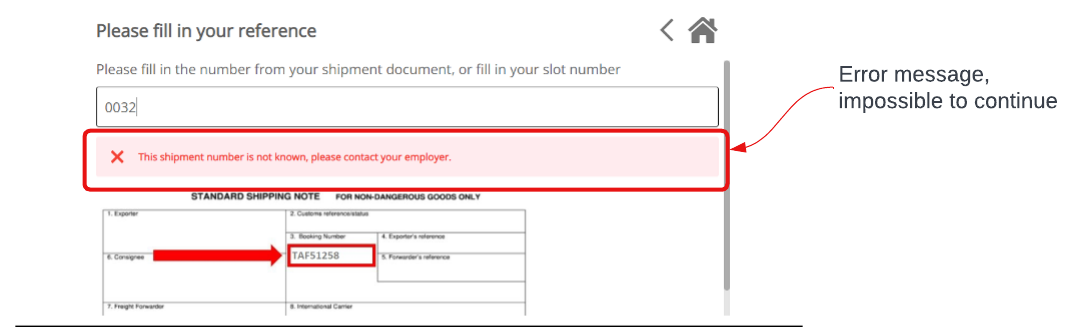 Approval Error | If Manual approval fallback is enabled, visitors without reference are allowed 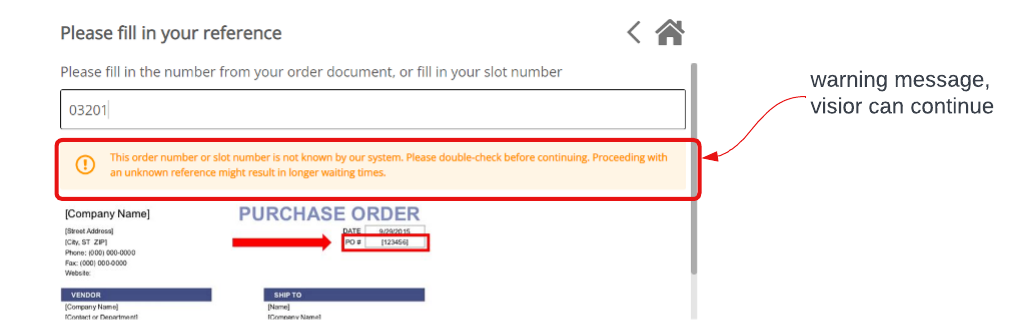 |
E-ticket
The E-ticket is another way of working with E-ticket flows.
Manual Approval
Visitors that are put in status “Waiting for Approval”, needs to be authorised/approved by user so access can be granted.
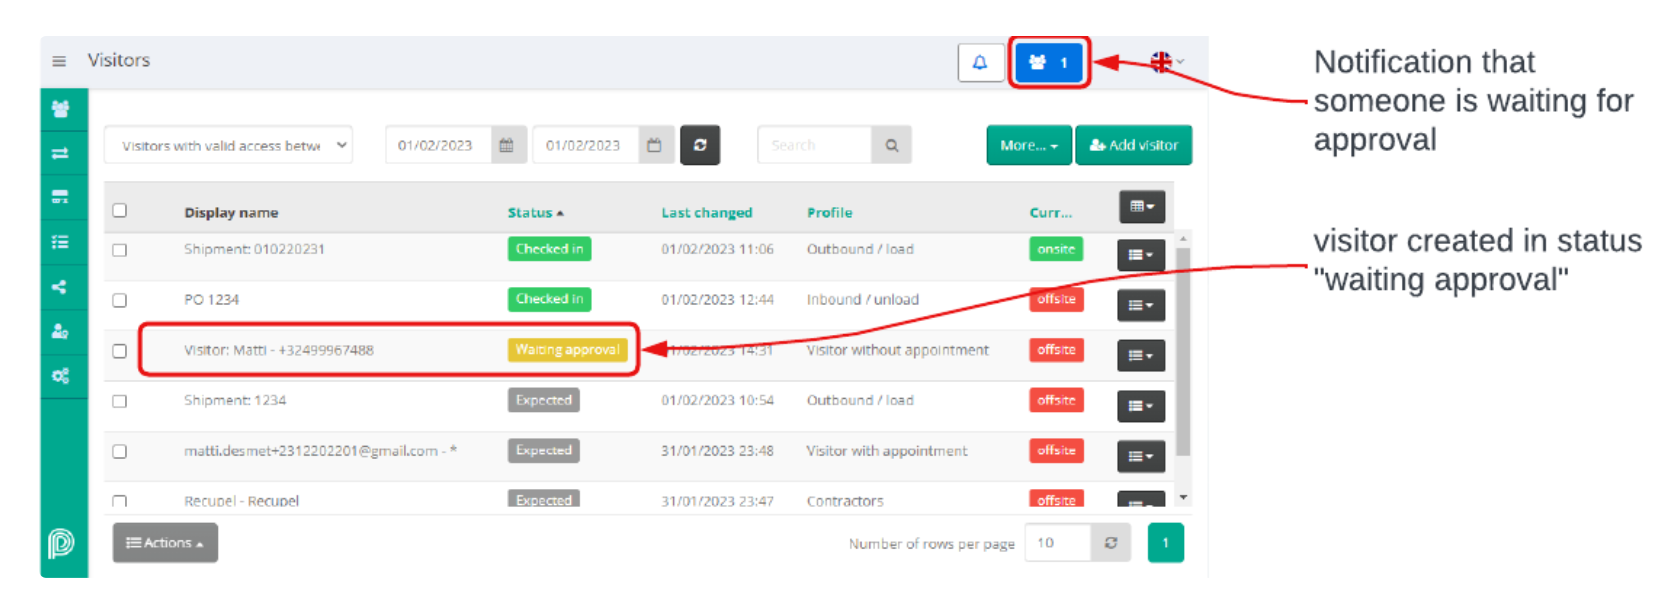
Visitor waiting for Approval
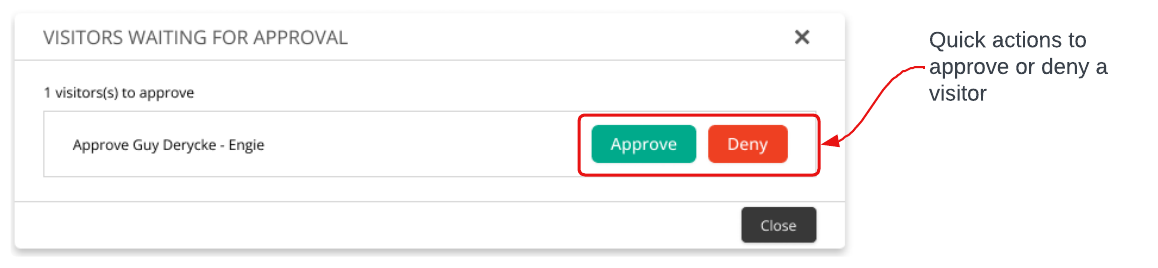
Visitor Approval
Note: find more out how to configure this, including some extra options on this page: Kiosk Approval flow
4. Phone Number input
When a phone number is linked to a profile and set to be requested during kiosk registration, it will be prompted immediately after visitor identification. This prevents situations where a driver completes most of the registration process, only to realize they need to retrieve their phone number—forcing them to return to their truck and start over.
5. Custom field data collection
Next up, the visitor will be required to provide the information that is tailored to your profile, using the linked fields.
It possible to:
Only ask for some fields to be completed by the visitor
Have certain fields optional and other mandatory.
All of this can be configured when linking fields to profile.
The order in which input is required from visitors is determined by the order of the linked fields on a profile.
Learn more about the abilities and best practices when using certain custom fields: Visitor custom fields
6. Welcome/Final Message
After registration is completed, a final message will be displayed in the screen. This message is configurable per profile.

Welcome message
Self-Service Kiosk - Other type of communication
Depending on the Triggers & Actions configured, Peripass can communicate with the visitor in different ways:
Printing a ticket/label
Sending a SMS
Sending an e-mail
7. Perform a status change
After registration, the visitor is transitioned, based on the approval flow:
Pre-registered visitors → Automatic approval | Ad hoc visitor → Manual approval |
|---|---|
Visitor is approved. New status is determined by the approval configuration Visitor profile . | Visit is set to WAITING FOR APPROVAL . Manual approval in the management portal is required. |
Not supported (yet)
Automatic approval ‘before profile selection’, as a way to determine the profile + visitor in one step
Decision trees in the Custom field data collection step, allowing you to skip steps based on previous answers. The product team is actively gathering concerning this topic. So please feel free to reach out to productops@peripass.com if you would need this.
How to set up
Choose your approval mechanism: Configuration > Profiles > Edit > Basic Information
Add fields you want to ask on Configuration > Profiles > Edit > Linked fields
Be sure to enable “Ask in question list on Self-Service Kiosk”
The order in which fields are being displayed in this list, determine the order in which they appear on the kiosk
Then create a kiosk configuration: Configuration > Self-service kiosk > Create:
Choose whether the kiosk should be used as a physical kiosk or a mobile driver portal (more about this: Self-Service & driver communication).
Add your profiles under Configuration > Self-Service Kiosk > Edit > Available profiles for check-in and add translations
Test your kiosk by browsing to the url displayed in the list of kiosks under Configuration > Self-Service Kiosks.
Note: you can only test the physical kiosk in your browser, not on your mobile phone.
Set up E-ticket
Instructions to set up E-tickets on a kiosk can be found here: E-ticket.