
Self-Service & driver communication
The different ways to communicate with drivers
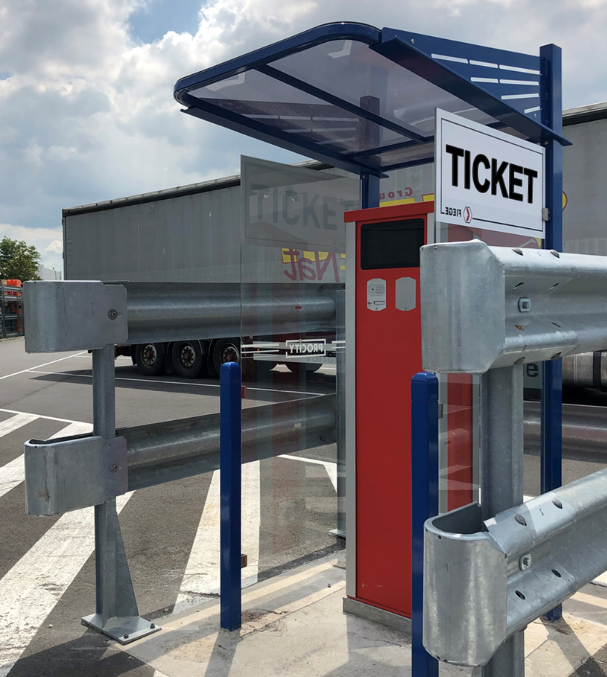
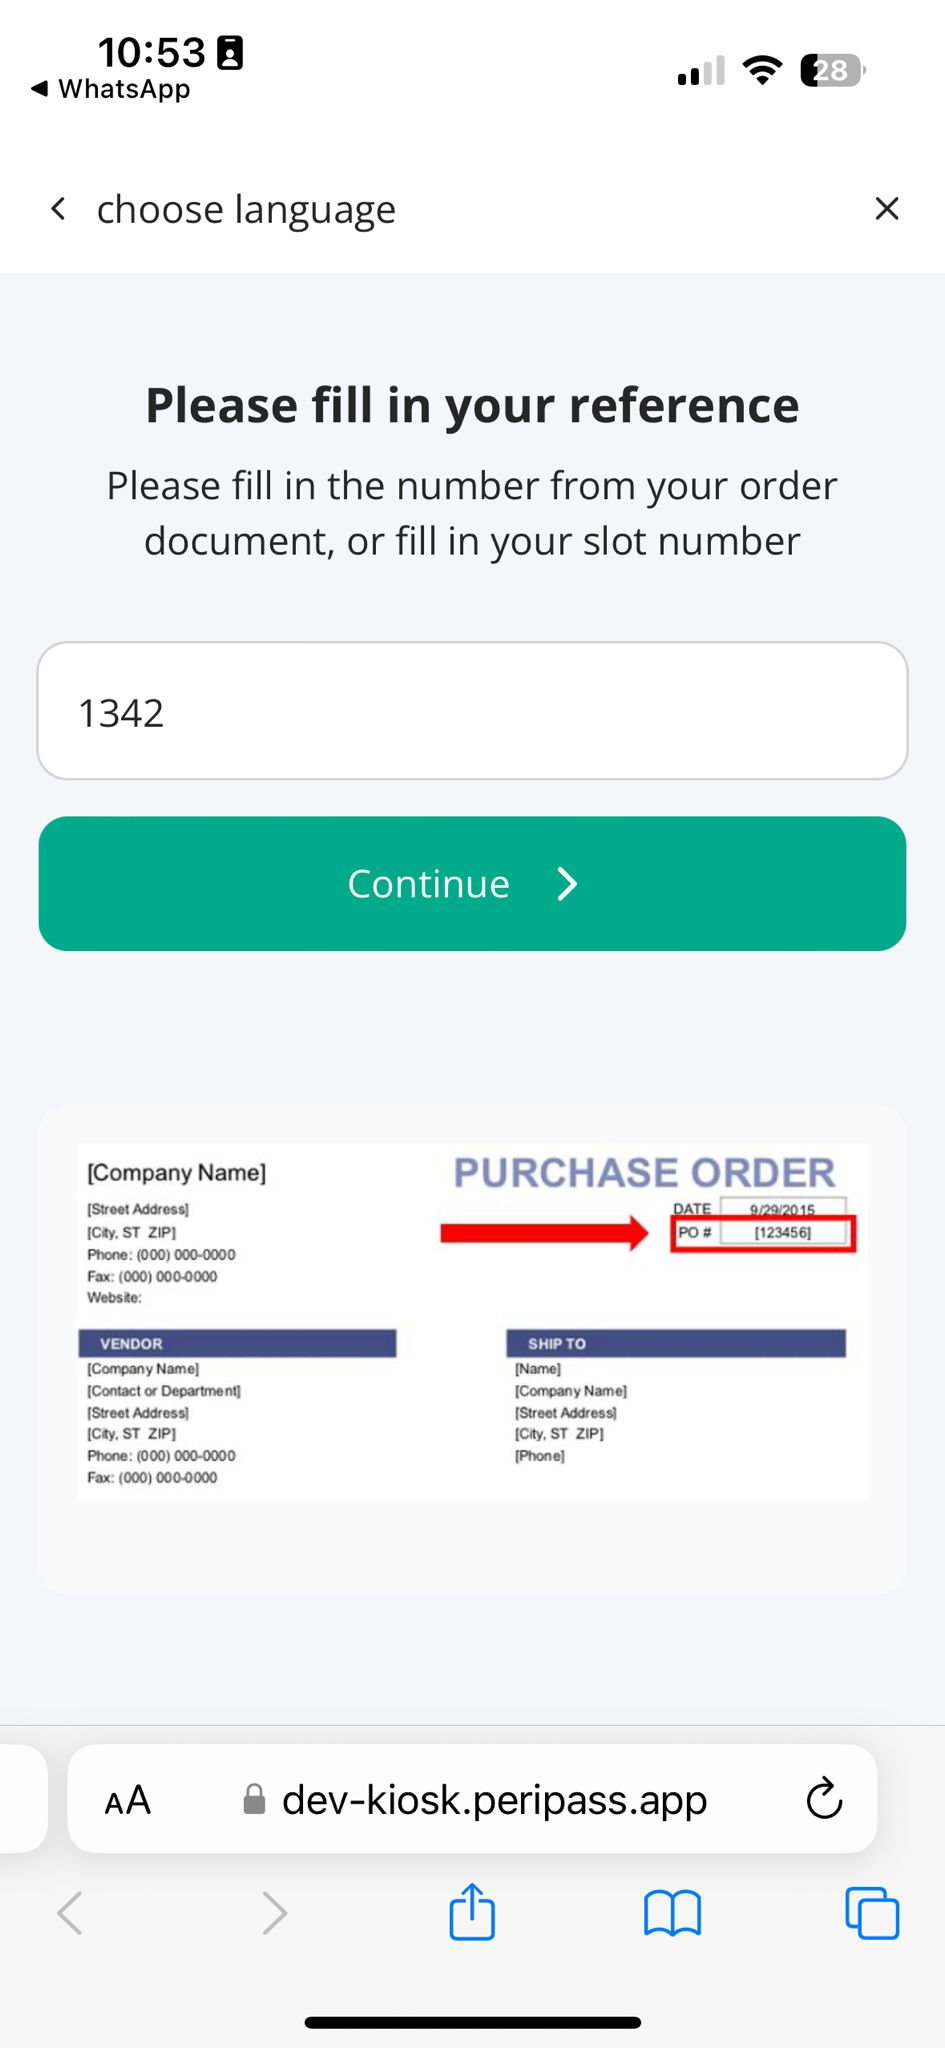
Self-service Kiosks | Text messages | |
|---|---|---|
Physical kiosk | Mobile driver portal | |
 |  |  |
Use cases:
| Use cases:
| |
Physical kiosk vs. Mobile driver portal
The mobile driver portal was first introduced to enable fast-lane registration, allowing drivers to access the kiosk configuration directly from their personal mobile phones without needing to install an app. We are working to create full feature-parity between the mobile driver portal and the physical kiosk. In the table below you can find the current status:
Feature | Physical kiosk | Mobile driver portal |
|---|---|---|
SUPPORTED | SUPPORTED | |
| SUPPORTED | NOT SUPPORTED |
| SUPPORTED | NOT SUPPORTED |
| SUPPORTED | NOT SUPPORTED |
| SUPPORTED | NOT SUPPORTED |
| SUPPORTED | SUPPORTED WITH LIMITATIONS More info: Mobile driver portal |
| SUPPORTED | SUPPORTED |
| SUPPORTED | SUPPORTED |
SUPPORTED | NOT SUPPORTED | |
| SUPPORTED | NOT SUPPORTED |
| SUPPORTED | WON'T BE SUPPORTED* |
SUPPORTED | WON'T BE SUPPORTED* |
*As an integration with hardware is required.
Learn more about the physical kiosk specifically: Physical kiosk
Learn more about the mobile driver portal specificially: Mobile driver portal
How to enable / disable languages
A kiosk process always starts with choosing a language. A language will popup on the welcome screen if one of the following translations is completed in the kiosk configuration. To disable a language from a self-service kiosk, ensure that all the aforementioned translations are cleared. If E-tickets are not enabled, you need to temporarily enable them in order to delete the translations.
General translations:
Welcome Text
Message when kiosk is blocked
'Ask for help' popup title
'Ask for help' popup description
Realtime approval translations:
Text while waiting for approval
Text after timeout
Error message after denial
Scanning Configuration translations:
Scan instructions for visitors
Failed scan - general information
E-Ticket Configuration translations:
Button title
Button description
Button image
Scan validation error message: Custom Ticket already validated
Scan validation error message: Custom Wrong date
Fallback confirmation text on registration completion with E-ticket. Will only be used when the profile is not assigned to the kiosk.
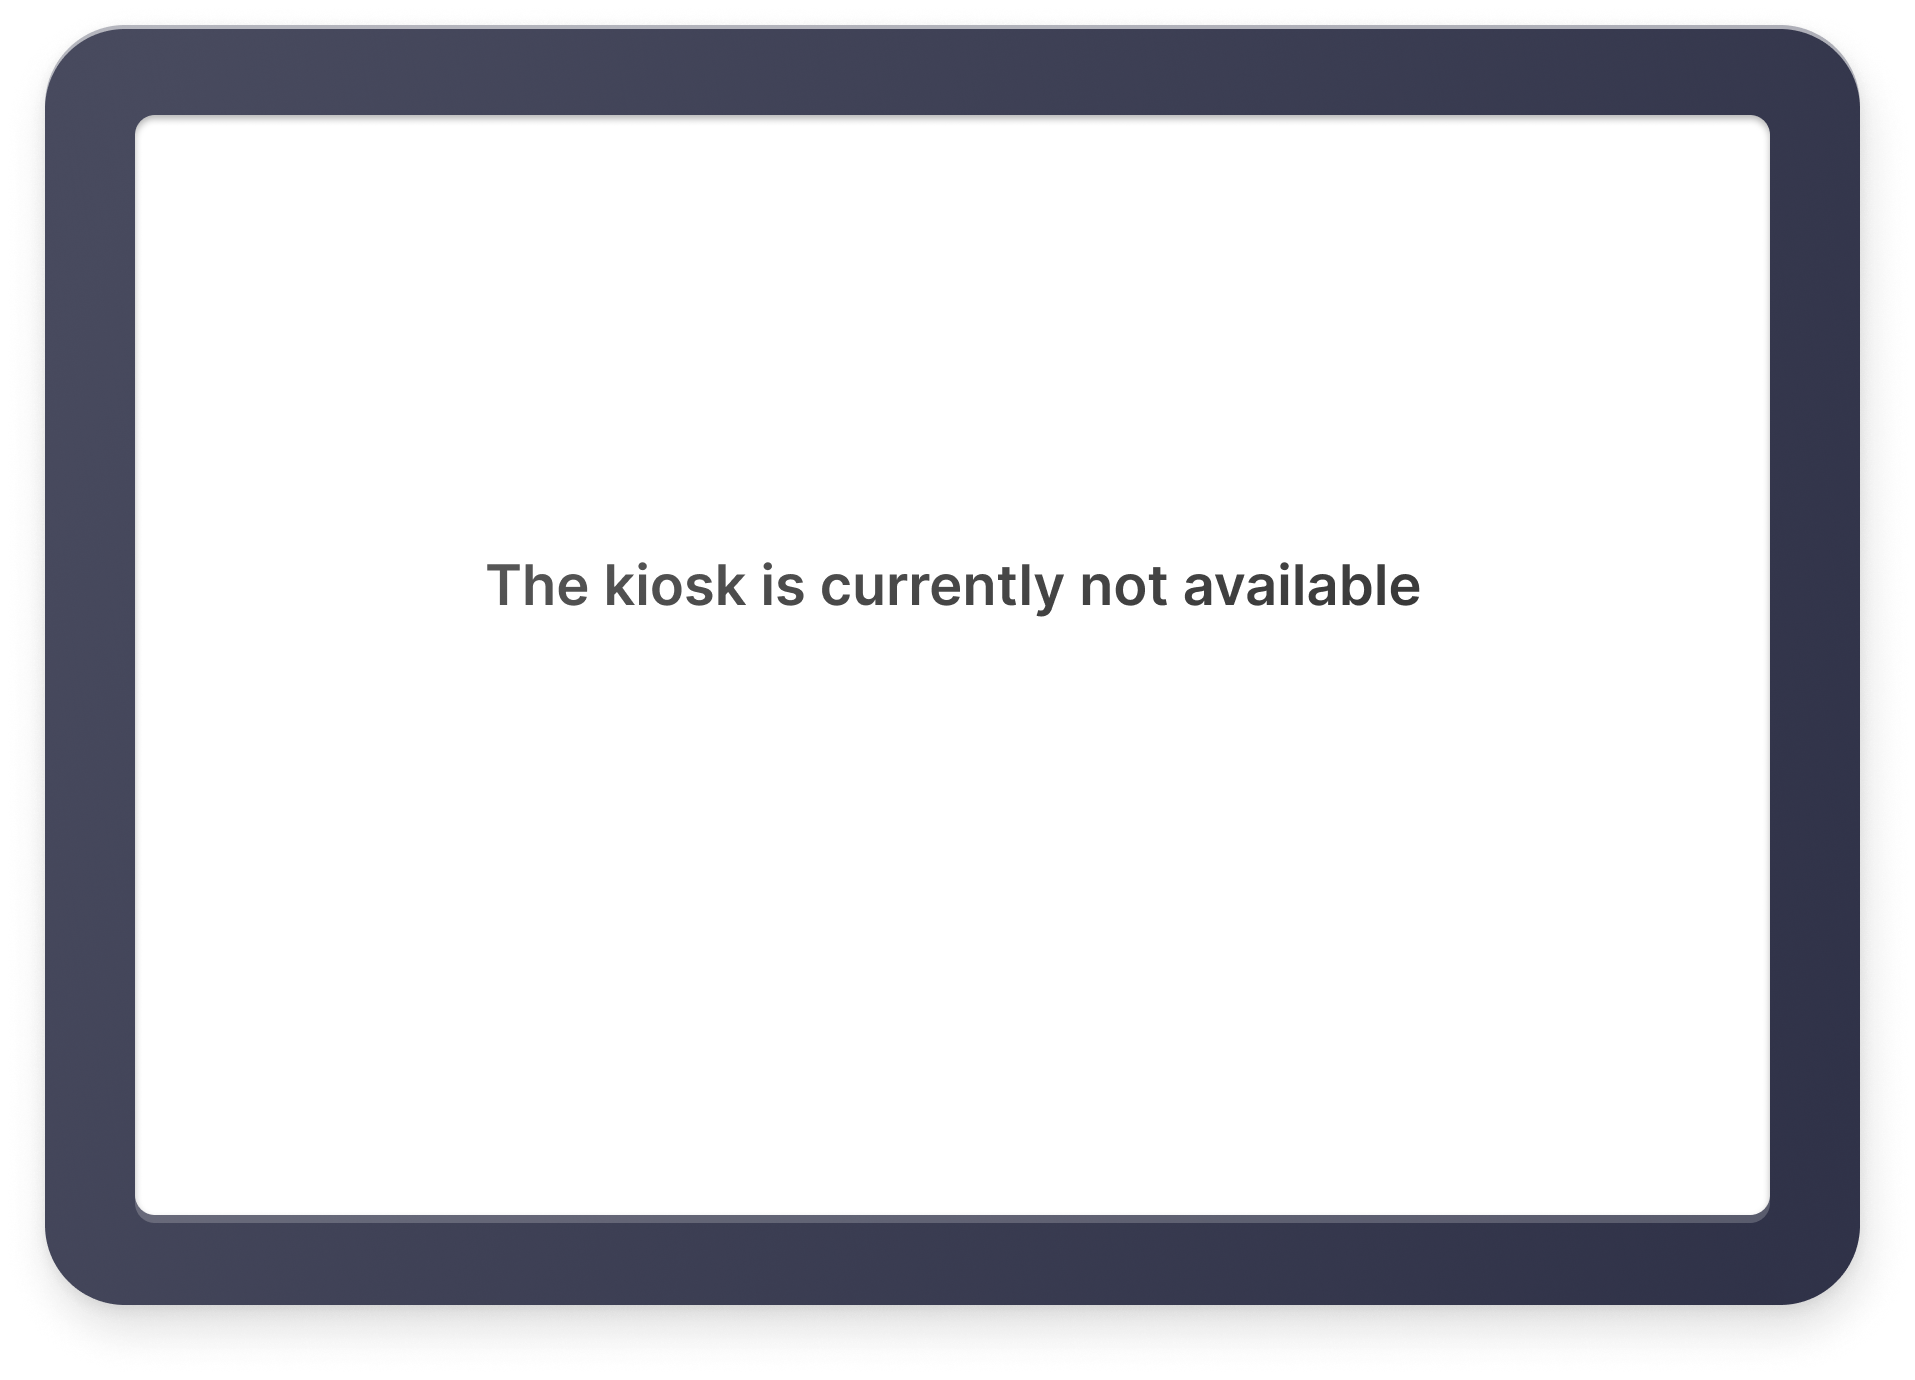
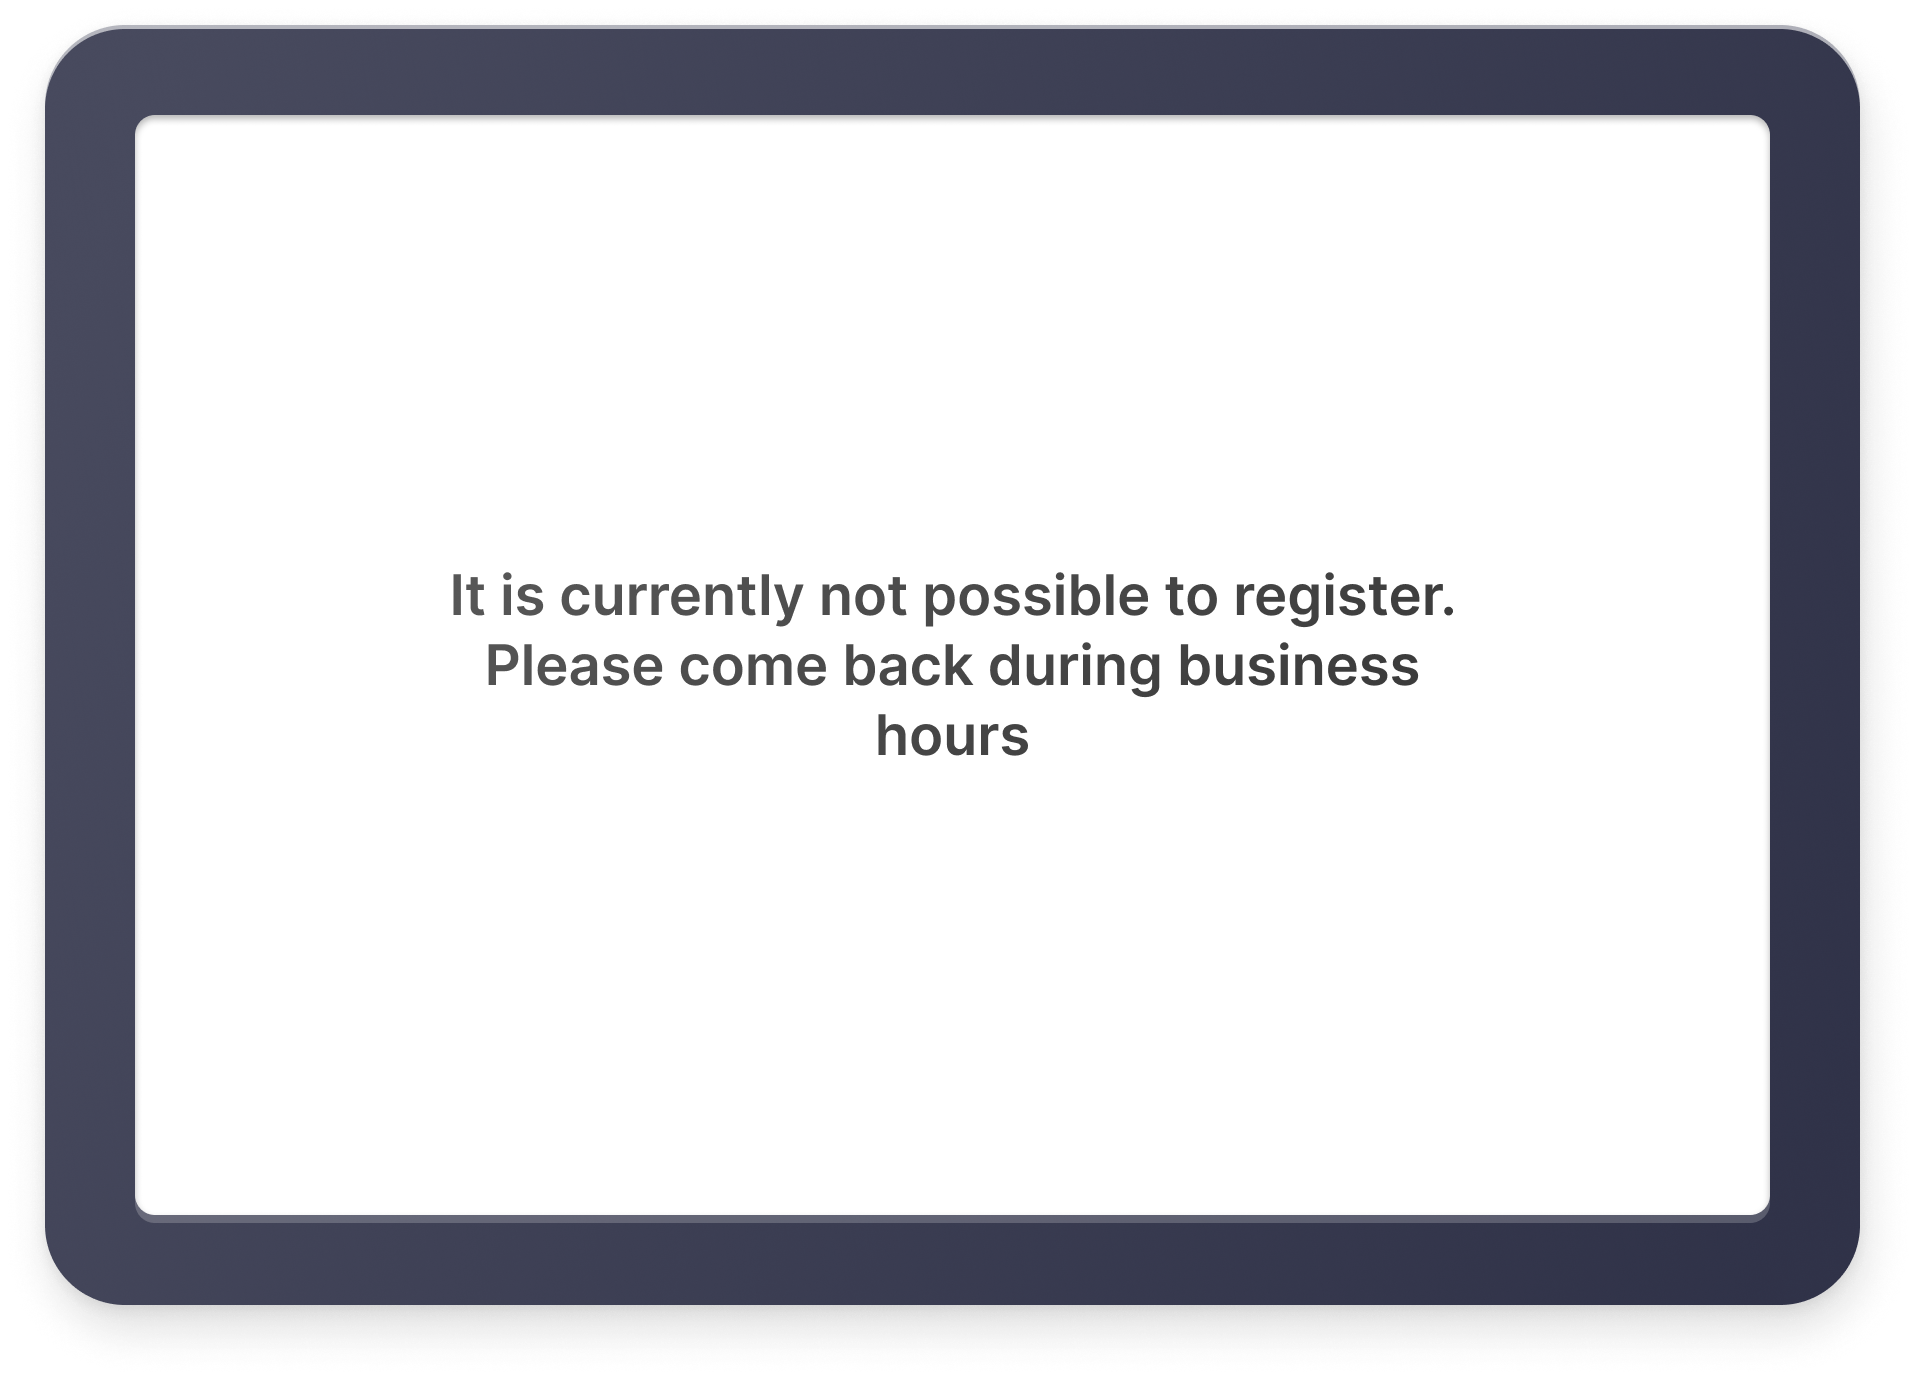
Disable a self-service kiosk
It is possible to disable a self-service kiosk. When a visitors tries to register they are informed the kiosk is disabled. This information can be adapted based on your specific use case.
Go to the kiosk and change the status to “disabled”: Configuration > Self-service kiosk > Edit self-service kiosk > Basic information tab: set the “status” to “blocked”. The message shown to the visitor can be adapted in the Translations tab.
Automatically disable a self-service kiosk based on a schedule
Using Triggers & Actions it is possible to disable and enable a self-service kiosk based on a schedule.
For this schedule to work, you need a dummy visitor:
Create a visitor for any profile of your choice.
Give the visitor the following name “AUTOMATION - DISABLE KIOSK - DO NOT CHANGE” in a custom text field of your choice (we will call it “name” in the rest of the instructions, but remember it can be any custom text field).
Set the visitor to blocked
Then create the following trigger:
Trigger: At a certain time: choose the time to enable/disable the kiosk
Conditions:
Profile = the chosen profile
Visitor custom field value for custom field name = “AUTOMATION - DISABLE KIOSK - DO NOT CHANGE”
Time of the day = according to your preferred schedule
Time of the week = according to your preferred schedule
Actions
Execute and API call - from the Peripass cloud:
Parameter | Value |
|---|---|
URL | To disable a kiosk: https://restapi.peripass.app/api/v2/selfservicekiosks/{your kiosk id}/enabled?tenant={yourtenant} To enable a kiosk: https://restapi.peripass.app/api/v2/selfservicekiosks/{your kiosk id}/blocked?tenant={yourtenant} |
Method | PUT |
Authentication | Other - specify in header/url |
Headers | add a header: first field: x-api-key second field: {your api key} |
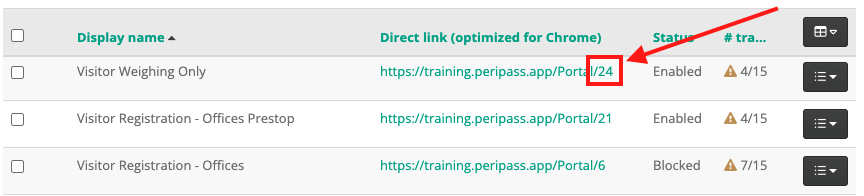
The kiosk id can be found in the url of the kiosk in Configuration > Self-service kiosk: in the column “Direct link”
More information on how to create an API key: API configuration for a tenant
More information on triggers and actions: Triggers & Actions
Interaction with hardware devices
A kiosk can integrate with various hardware devices, enabling seamless interaction through the power of triggers and actions. The configuration for these integrations is accessible within the setting of the Actions .
Some interesting hardware components and what you can do with them:
Hardware Component | Use case |
|---|---|
Ticket printer or textile printer | Print a ticket with a visitors personal pin code to avoid that your visitors forget their code. A textile printer can be used to print a name badge on the go. |
NFC Reader | Provide a pile of empty badges at your Kiosk and let visitors activate them on the fly during their registration process. |
QR-code scanner | Scan e-ticket. |
Intercom | Provide a direct support line when users get stuck Initiate a call at the end of the registration to notify the host |
IP Camera | Take a photo of your visitor at moment of arrival and departure. This can provide proof if the truck driver claims a damage caused by an operation on the premises of the customer. |
I/O module | Sound a buzzer when a visitor did not drive to his assigned dock from the waiting parking after 15 minutes. |
Won’t do / limitations
Use an eID scanner to verify the identity and to autofill some straightforward fields such as name.
Reasoning: to verify the identity we would need to build an integration for each country that currently uses an eID. We know the eID format has been standardized, but every European country still has their own API at which you need to verify whether the eID is an official one.
Alternative: if the identity needs to be verified as part of the registration process, we advise to make use of Certified Persons
For the following features you need a local server + a local action worker (more info on local services: Local Services ):
document scanning
document printing
ticket printing
passport scanning
Troubleshooting
Dealing with empty kiosk screens
In 90% of the cases an empty kiosk screen is caused by a missing translation. Check whether there are any translations missing before contacting support.