
E-ticket
When to use?
An E-ticket is used for office visitors and contractors, to speed up the registration flow. when you have contact information of the visitor up front.
Typical used in combination with the Calendar Connector. Calendar Connector
Main idea
An E-ticket will serve as an authentication method to speed up the self check-in. It links the person on your site with a Visitor in Peripass.
It is possible to create multiple E-ticket templates per tenant in Peripass. Each E-ticket template can be linked to one or more profiles.
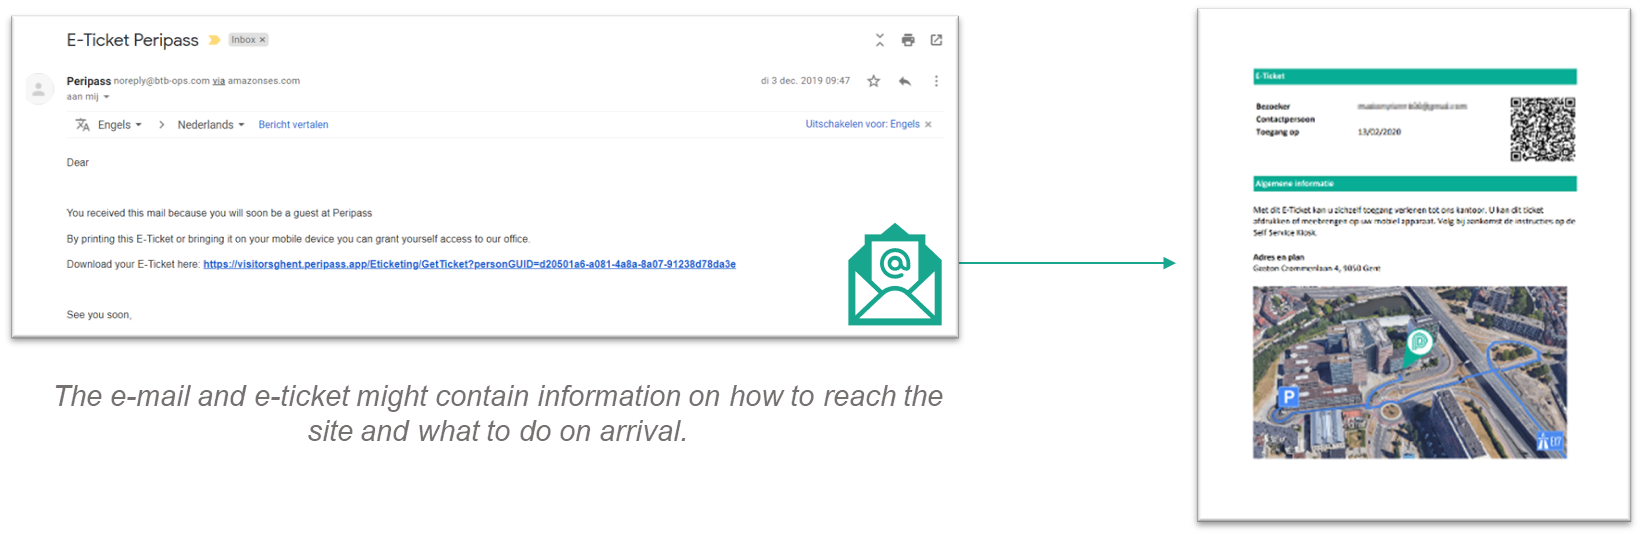
A link to the e-ticket is being mailed to the visitor. By clicking on the link a webpage opens with the E-ticket. A visitor can use the this webpage as E-ticket or download the E-ticket as pdf from this page.
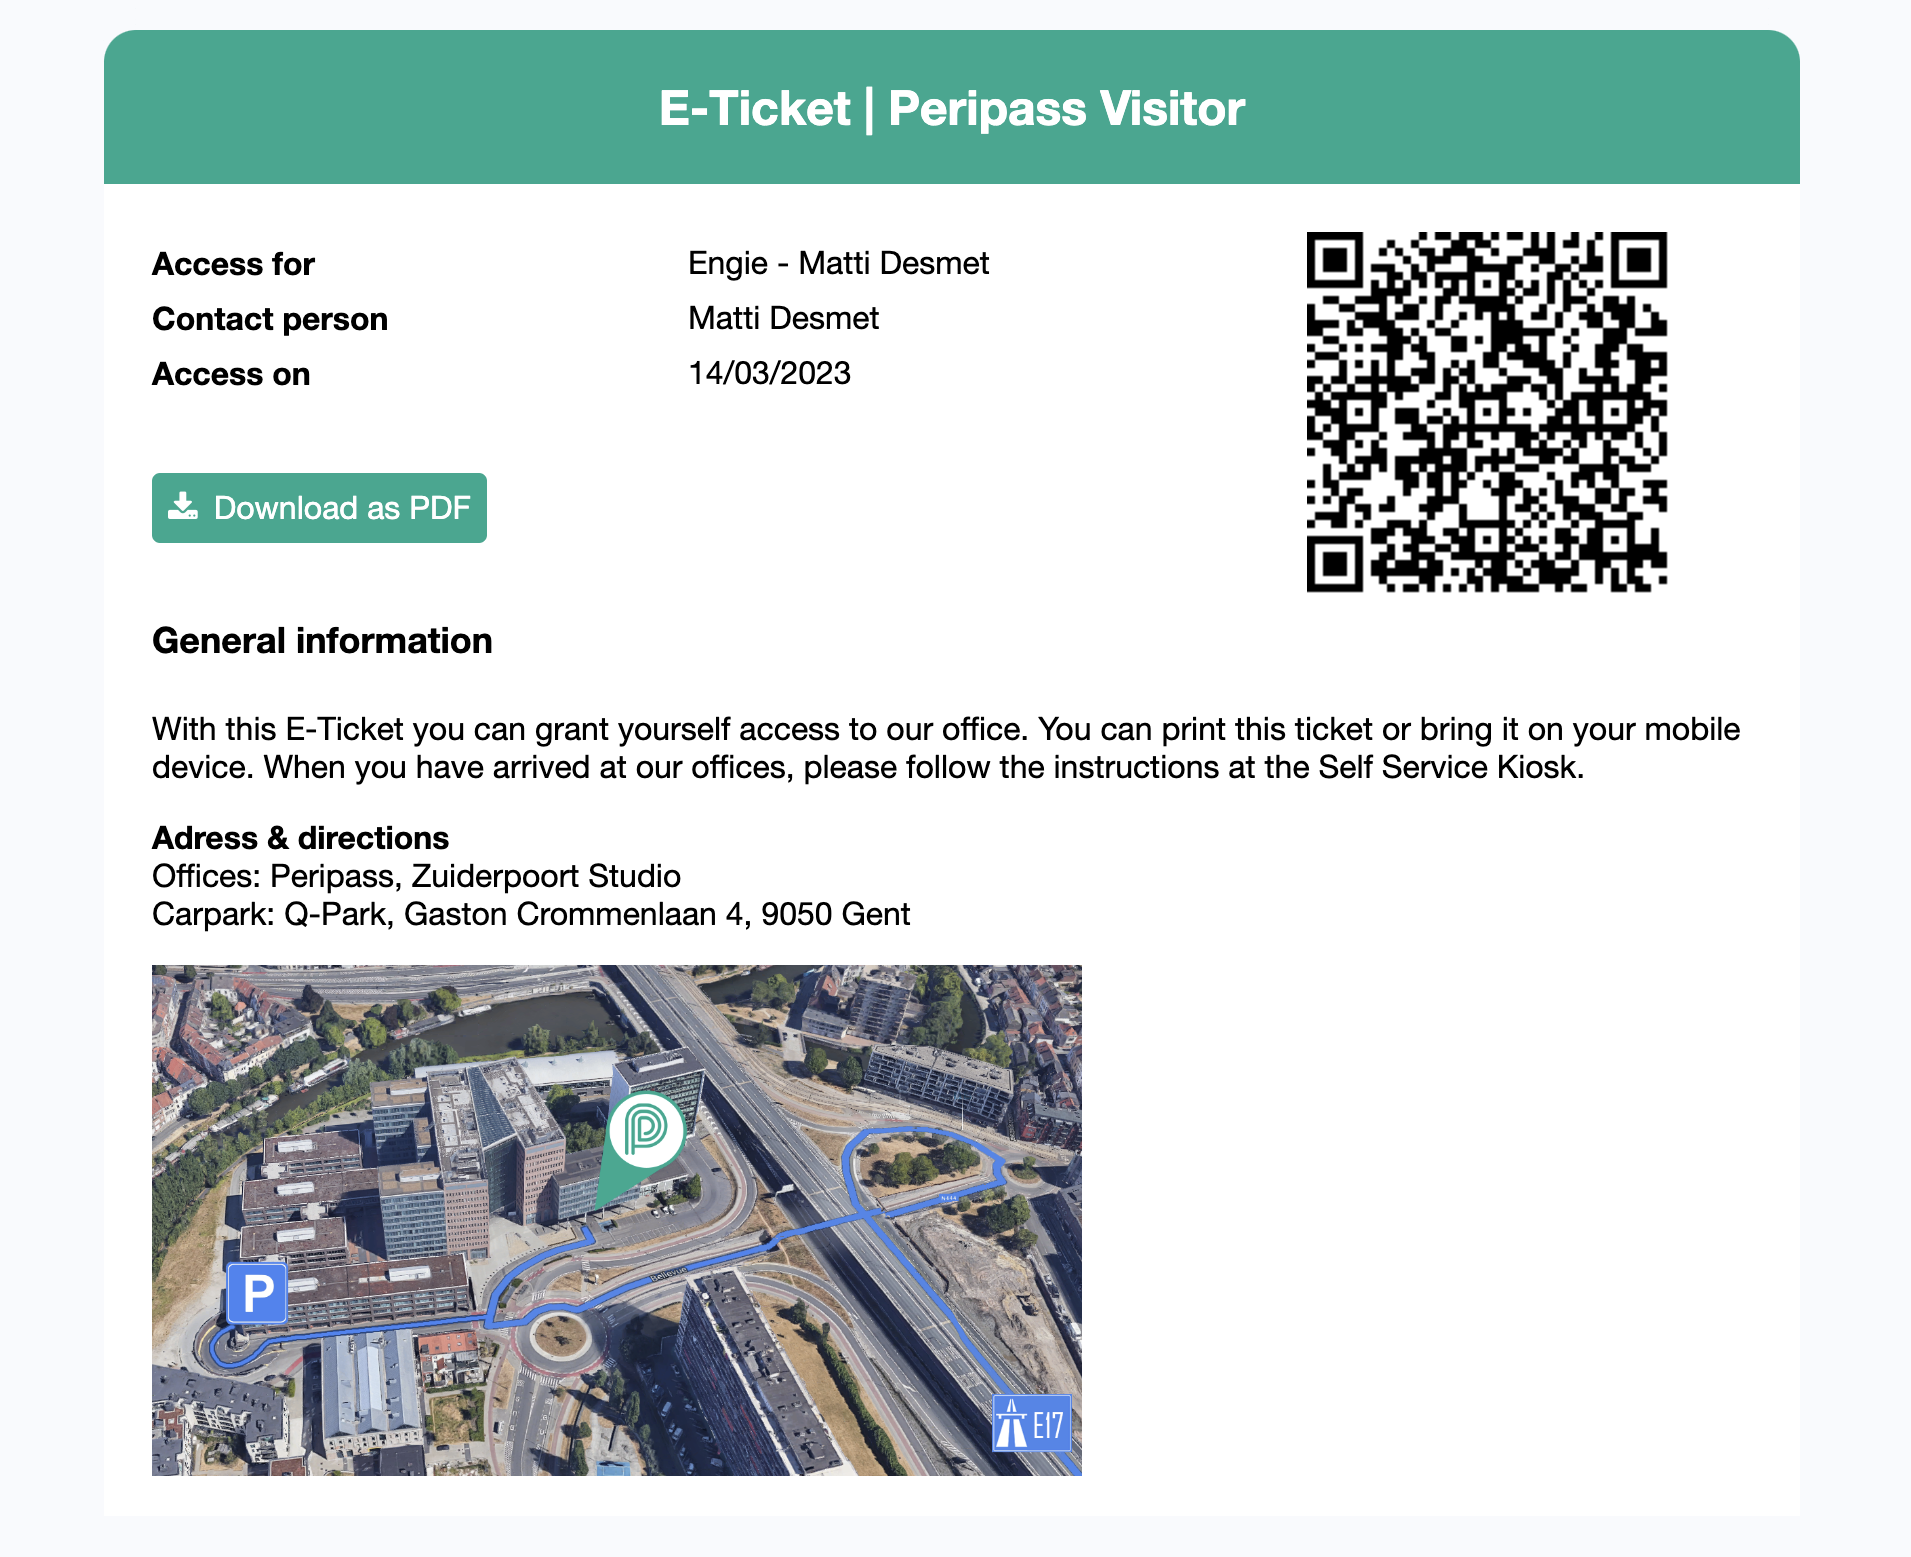
Note: The coloring of the bars and the layout on the bottom part of of the E-ticket is configurable to any branding style of the customer.
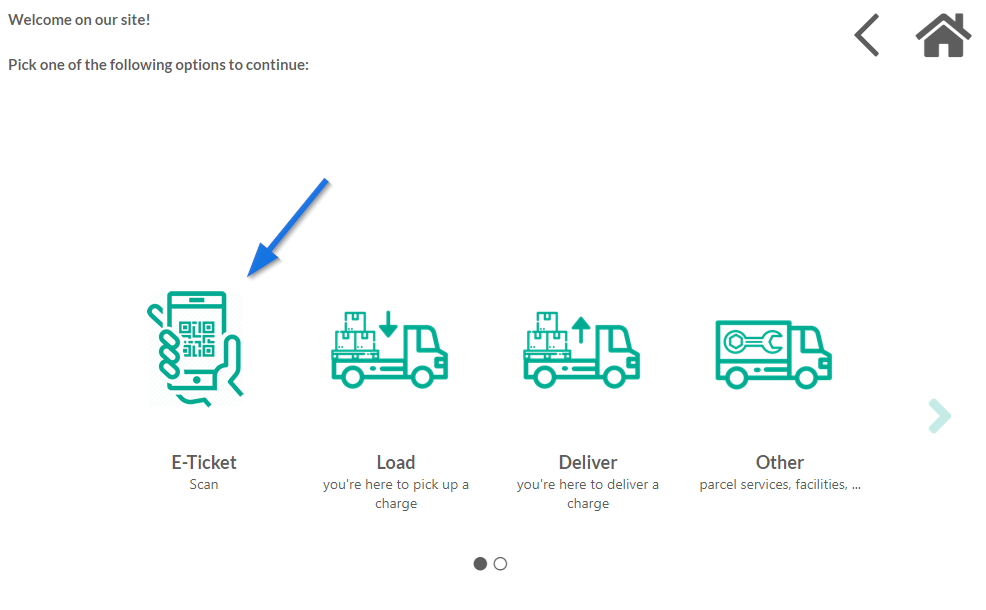
The QR code in the upper right corner can be scanned on the kiosk, by selecting E-ticket:
The check-in process will be the same, but all known fields will be pre-filled. However, it is good practice to not ask the known fields on the Self Service Kiosk when inviting visitors using E-tickets.
An E-ticket is always valid for all Assigned Profiles and thus for all dates and periods the Visitor is invited.
How to use
Send an E-ticket
There are multiple ways to send an E-ticket:
Using the management portal: click the action menu and click send E-ticket.
If the option “send E-ticket” is not available, this might be because your visitor has no email address.
Send an E-ticket using Triggers & Actions (for example when a visitor was invited via Calendar Connector ).
Register at the kiosk using your E-ticket
At the day of the visit, the visitor should complete the registration at kiosk selecting the Qr-code/E-ticket registration option.
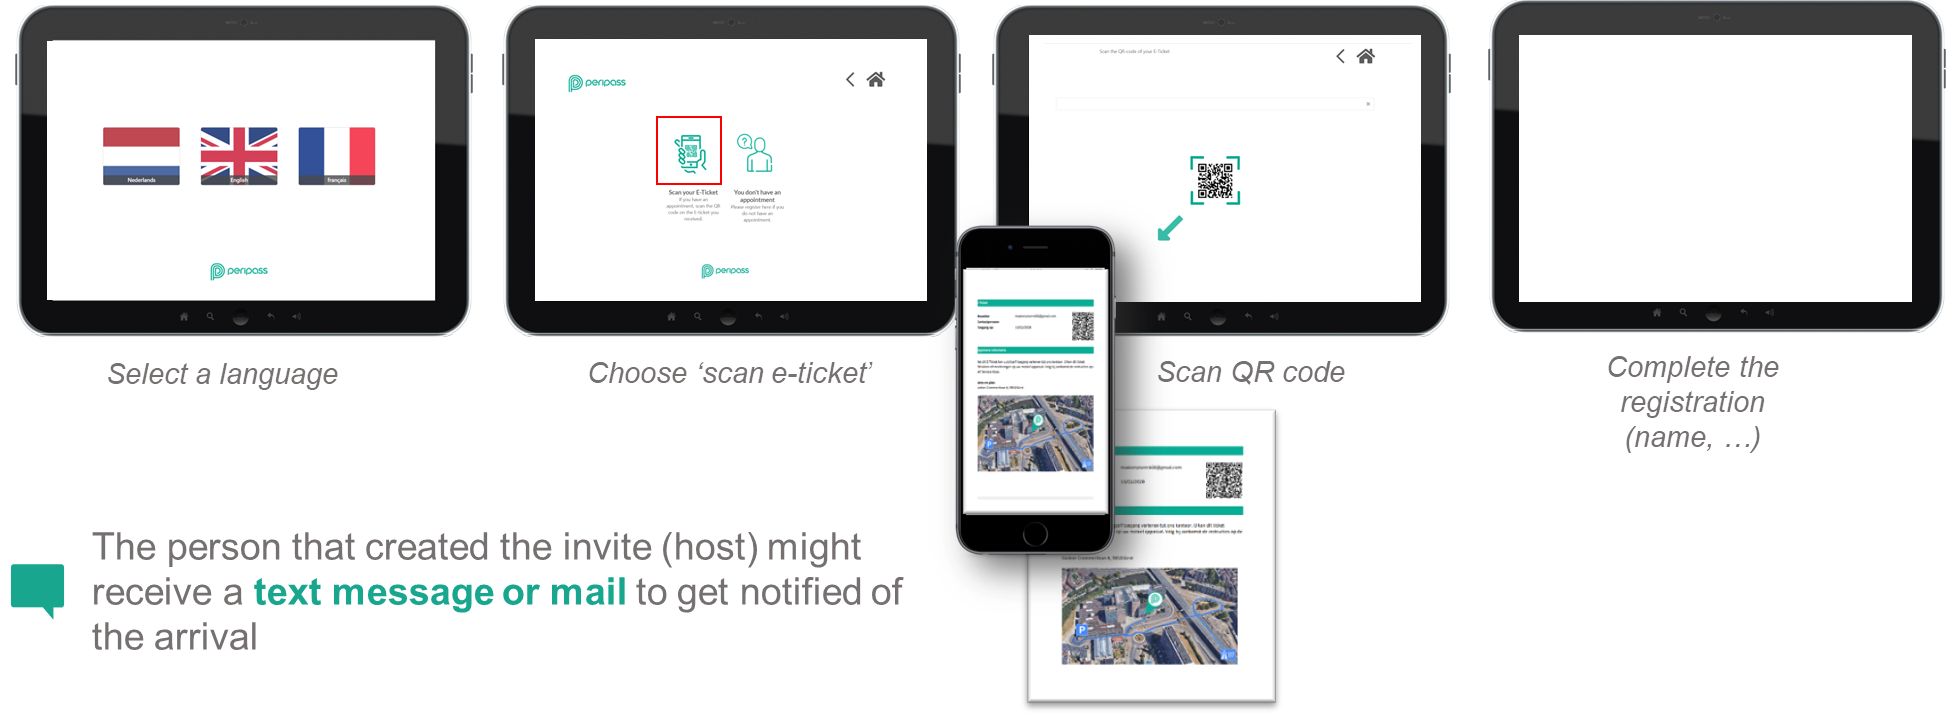
Note: After first registration, information might be stored in Peripass so they can be pre-filled in a next registration
Won’t do / limitations
The E-ticket will always correspond to the visitor’s active profile.
If a visitor has multiple upcoming visits (and thus multiple future validities), the E-ticket will refer to the active profile only (e.g. when using the visitor action ‘Download E-ticket’).
If a visitor receives an invitation from host-1 but already has a future visit scheduled with host-2, the E-ticket sent after the invitation will refer to the active profile. Depending on which meeting is scheduled first, the active profile could correspond to either host-1 or host-2.
E-ticket should not be used for registration of transports
Although it might seem tempting to use E-ticket for easing the registration of drivers, this is a theoretical solution and not a realistic one. Experience learns that it is very hard to communicate a unique transport reference to a driver. Multiple companies that have tried sending E-tickets to drivers did not succeed and changed their approach afterwards. Even companies that stated “we have good carriers”, “we work with local carriers” and “we can oblige our carriers to follow our processes” did not succeed.
Warning: we understand it is tempting to try to send E-tickets to transports. However multiple customers have tried and came back from this decision. Be sure to read best practices before deciding.
More information
Visitor profiles on the Self Service Kiosk
When checking in with E-ticket, the available Visitor Profiles of the Kiosk will be ignored. In other words, using an E-ticket, any visitor can check-in on this Kiosk.
How to setup
The basics
Configure a template: go to Configuration > E-ticket templates > Add e-ticket template.
Translations:
The email subject and content are required in the default language.
If translations are provided for the e-ticket but not for the email subject and content, the email subject and content will default to the original language.
Enable this template on the profile: Configuration > Profile > E-ticket and calendar connector > choose a template.
Add an e-mail field to your profile: Configuration > Profile > Linked fields > Add a linked field.
Enable E-ticket on the kiosk: Configuration > Self Service Kiosks > edit a kiosk > under Basic Configuration enable the E-ticket feature.
Then, within the kiosk configuration, complete all translations in the E-ticket Configuration tab.
Lastly, decide the status the visitor should get after registering on the kiosk. You can do this also within the kiosk configuration, in the E-ticket Configuration tab.
Pro tip for testing your e-ticket without hardware
When you open an E-ticket in your browser, you can find the number of the QR-code in the url. It is the sequence of numbers after the “GUID=”. You can copy paste this into the QR-code scanning screen on the kiosk, to mimic scanning your E-ticket.
Automation
E-tickets are not send by default. Typically it is advised to create an automation to send the e-ticket:
Trigger: “When a new profile is assigned…”.
Condition: Visitor is not created by the management portal
Action: “Send E-ticket”
This way whenever a visitor is invited for a new day/period, the visitor will automatically receive an e-ticket.
The condition is required as when a visitor is created in the management portal, the end user has control about whether he/she wants to send the e-ticket or not. In this case you don’t want automation to interfere.
See also: Triggers you need before starting
Interesting case: normally you allow visitors & contractors to be invited multiple times to your site. It is good practice to think about how you want to handle a blocked visitor. Best solution:
Don’t send e-ticket to visitor when blocked, but notify the host.