Contactless document handling
When do you need this
When you want to increase the productivity of transport desk employees by allowing them to work undisturbed (avoid that truck drivers keep disturbing them).
When you want to increase driver comfort, by facilitating the document handling in their own language. When you want to avoid mistakes and communication struggles related to this process.
When you want to enhance process conformity, by making sure every document is digitized. No more lost documents. Automated workflows for scanned documents, resulting in less administration follow-up.
Main idea
Peripass document handling allow so
Store documents
Sign documents on upload (by transport desk)
Scan documents during registration
Sign documents during check out (by drivers)
More on this: Document signature: certified by Peripass
Print documents during check out
Print documents at any desired time (using Triggers & Actions)
Email documents (using Triggers & Actions)
How to use
The difference between a workflow document and other attachments
Workflow documents  | Organised attachments that have business logic attached. They have a document type such as CMR or bill of lading. There can only be one workflow document of each document type per visitor (e.g. only one CMR, one BOL, …). |
Pictures  | IP camera pictures Yard task pictures Captured as part of a yard operations task for this visitor. |
Miscellaneous  | Unorganised attachments. Can be anything. Only purpose is to save them with the visitor. No business logic, printing, scanning or signing is possible with these attachments. |
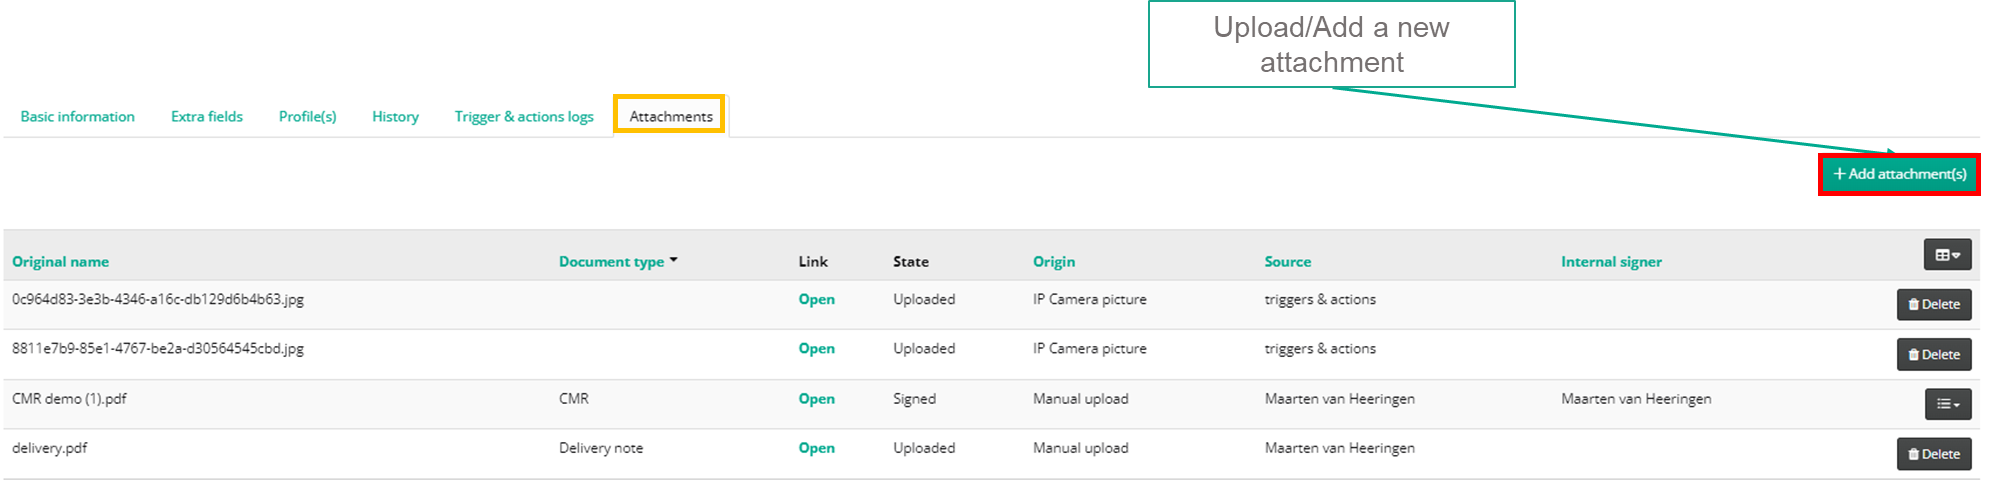
Manually uploading a document
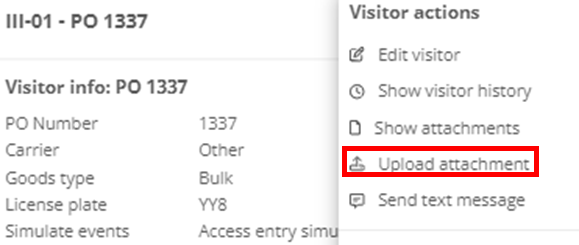
Peripass does not create documents, but documents and pictures can be attached to visitor via API or manually.


Sign on upload
When your document requires a signature on upload, this will happen automatically.
If you do not have a signature configured, you will not be allowed to upload this type of document.

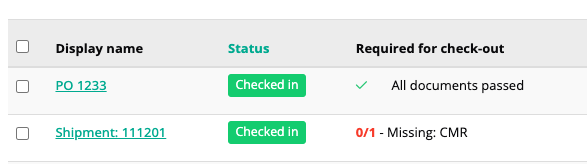
View summary of missing documents
In the visitor overview, you can view a summary of the workflow documents that are required for check out. Enable this column by clicking on the black button on the top right of the table and enable the column with the name “required for check out”.
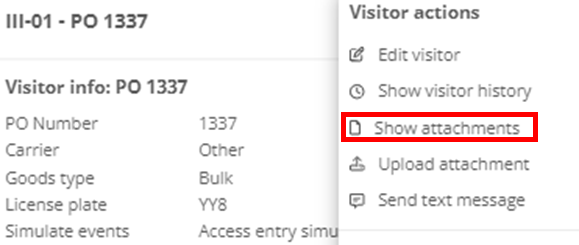
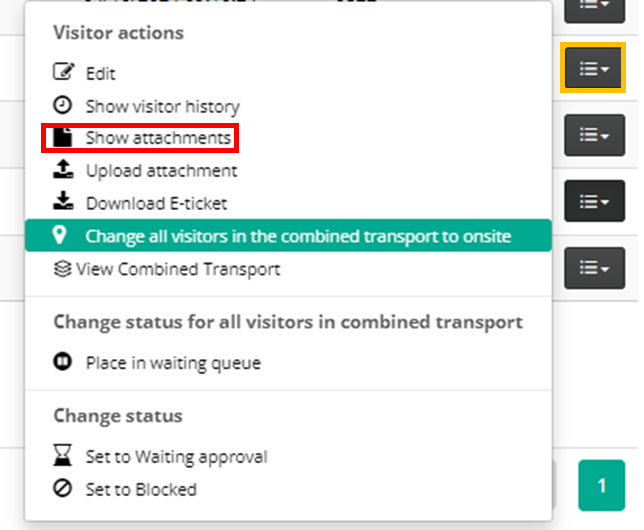
View documents and attachments for a single visitor
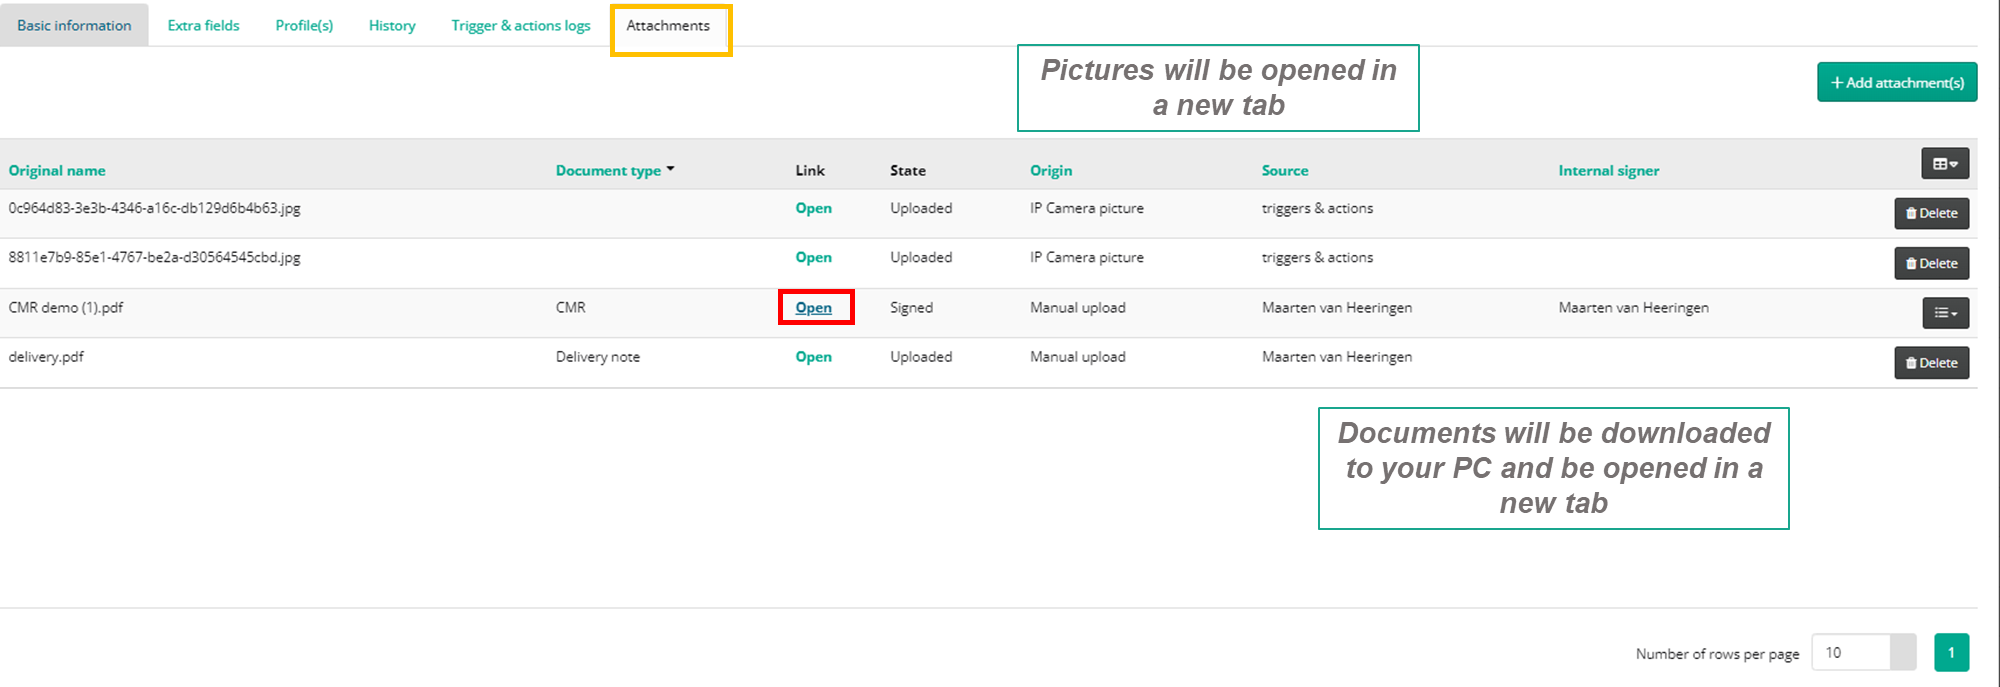
Note: A document can have multiple versions. This is used to distinguish the original uploaded document from the signed version. Once a document is signed, it is no longer possible to modify or delete it. New uploads will be added as new versions. The status of the file always displays the latest upload.
Warning: uploading a new version of a file does not impact the status of the visitor. If the visitor needs te re-sign, this should be handled manually or using triggers & actions.
Scan a document
During registration, the visitor can be asked to scan a document. This flow has following steps:
Step | How it looks on the kiosk |
|---|---|
Visitor is asked to fetch the right document. An example is shown to help choosing the right document. Note: Make sure to have a clear “Example” watermark on the picture to avoid any misunderstanding. | 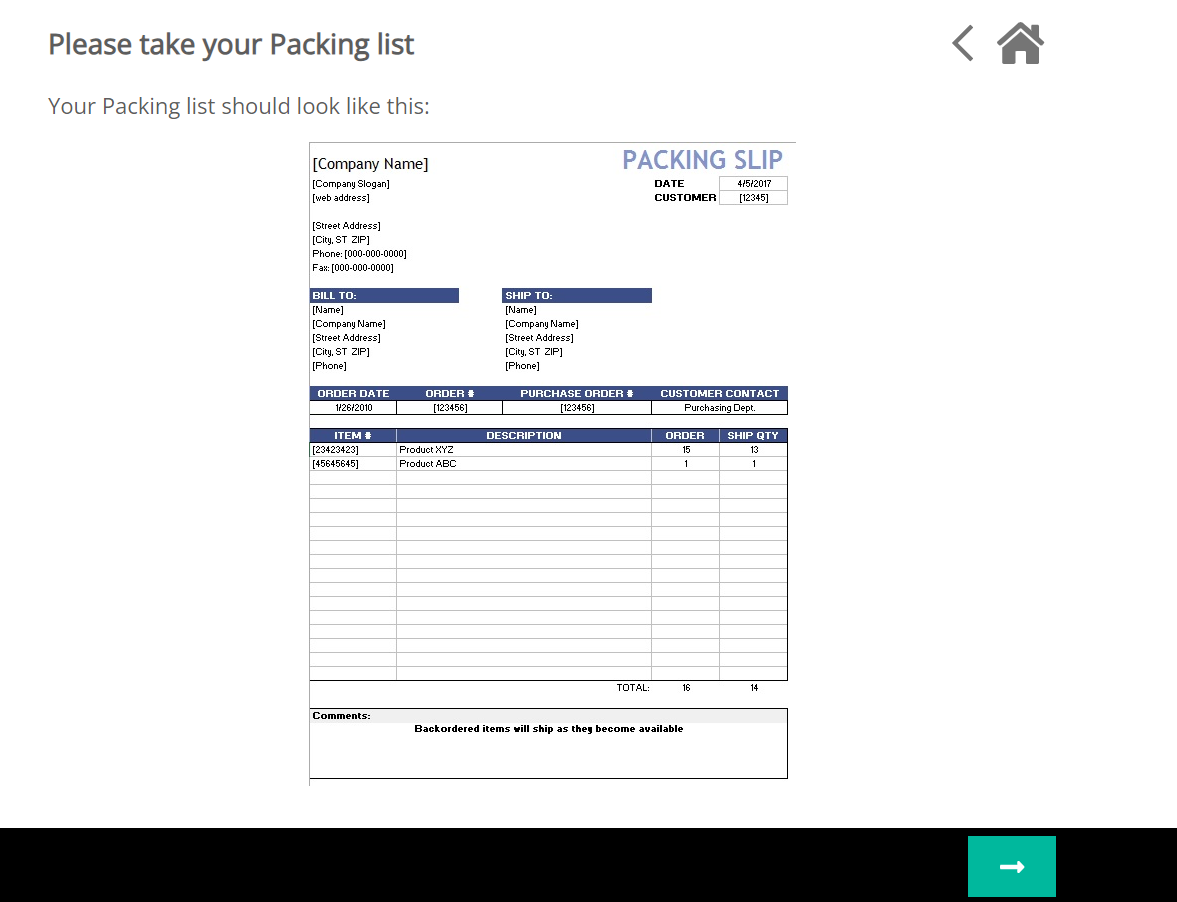 |
Visitor is asked to insert the document in the correct way. | 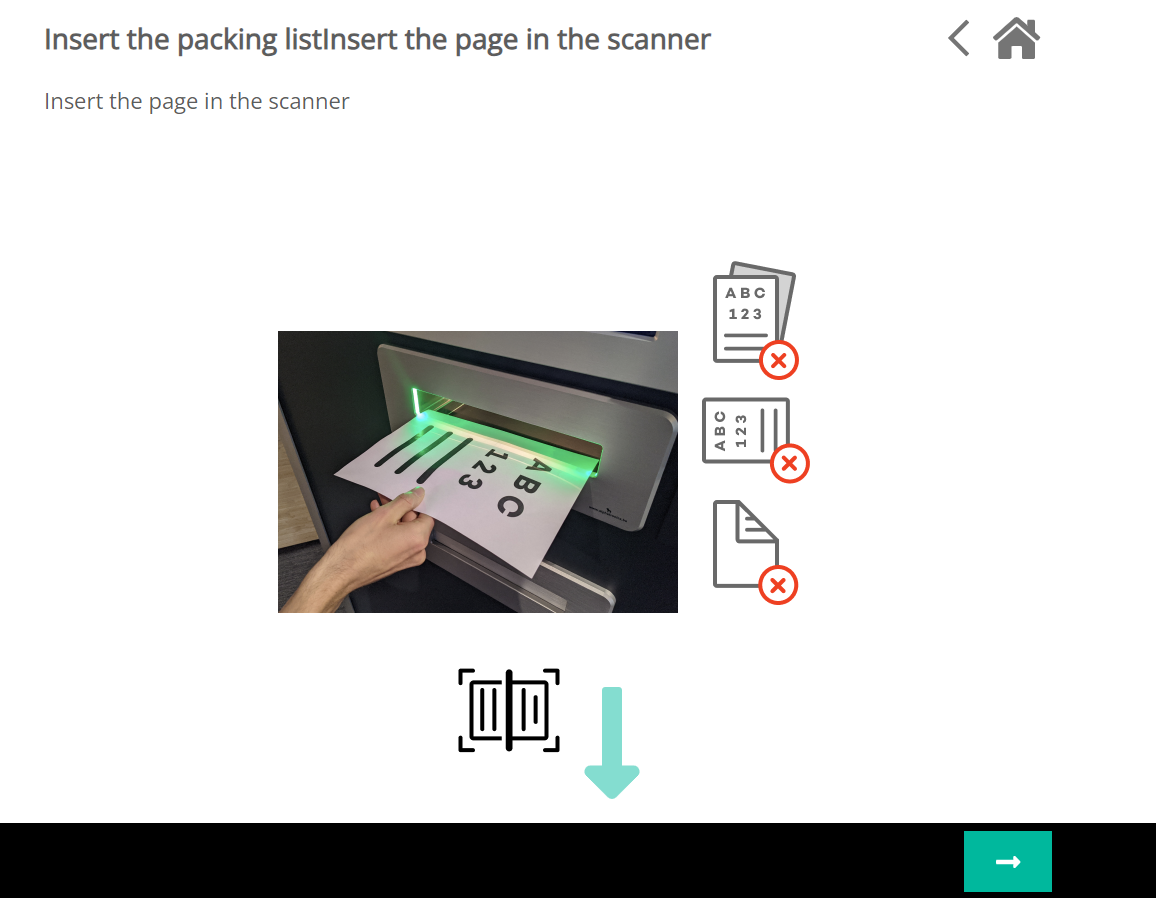 |
Scanning in progress | 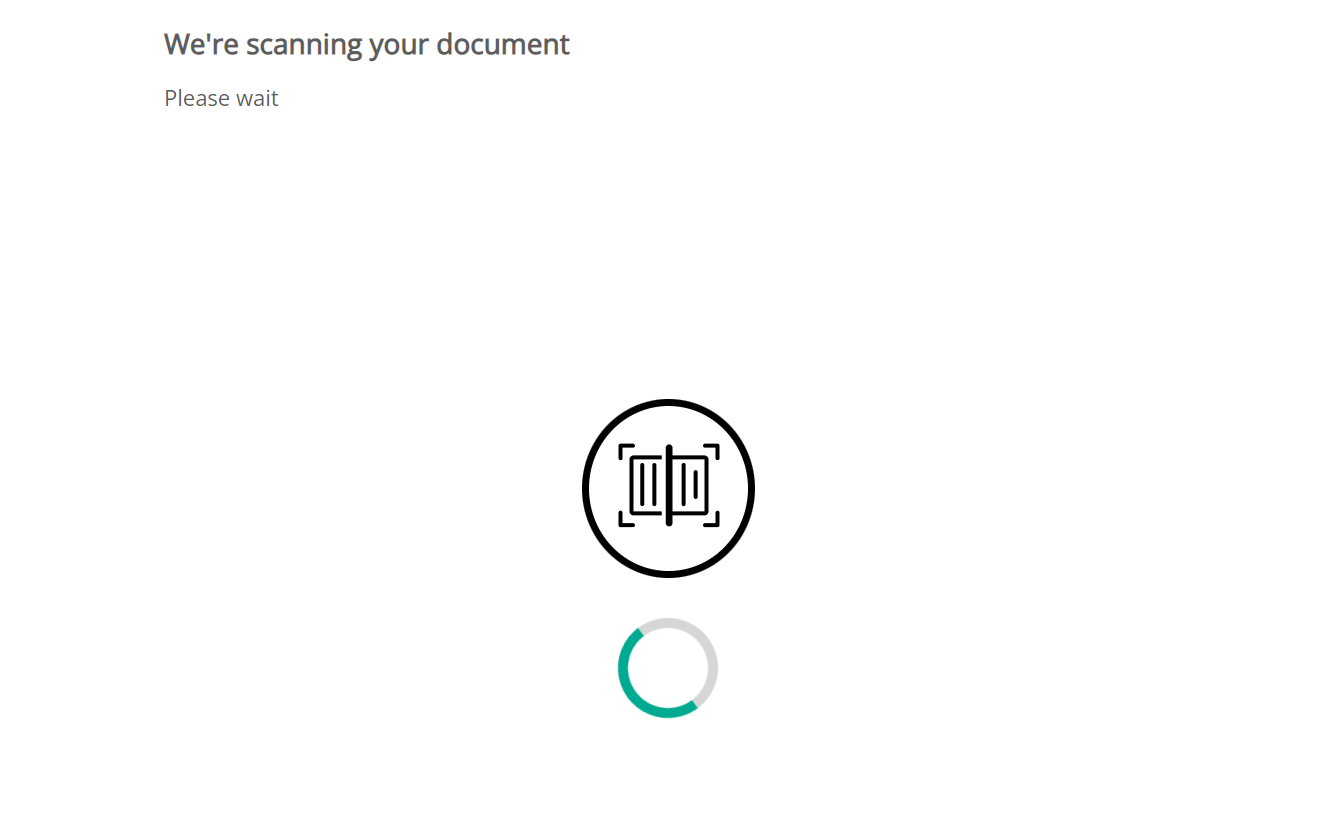 |
Visitor is asked to confirm the scan. This is mainly to validate the page is not upside down. | 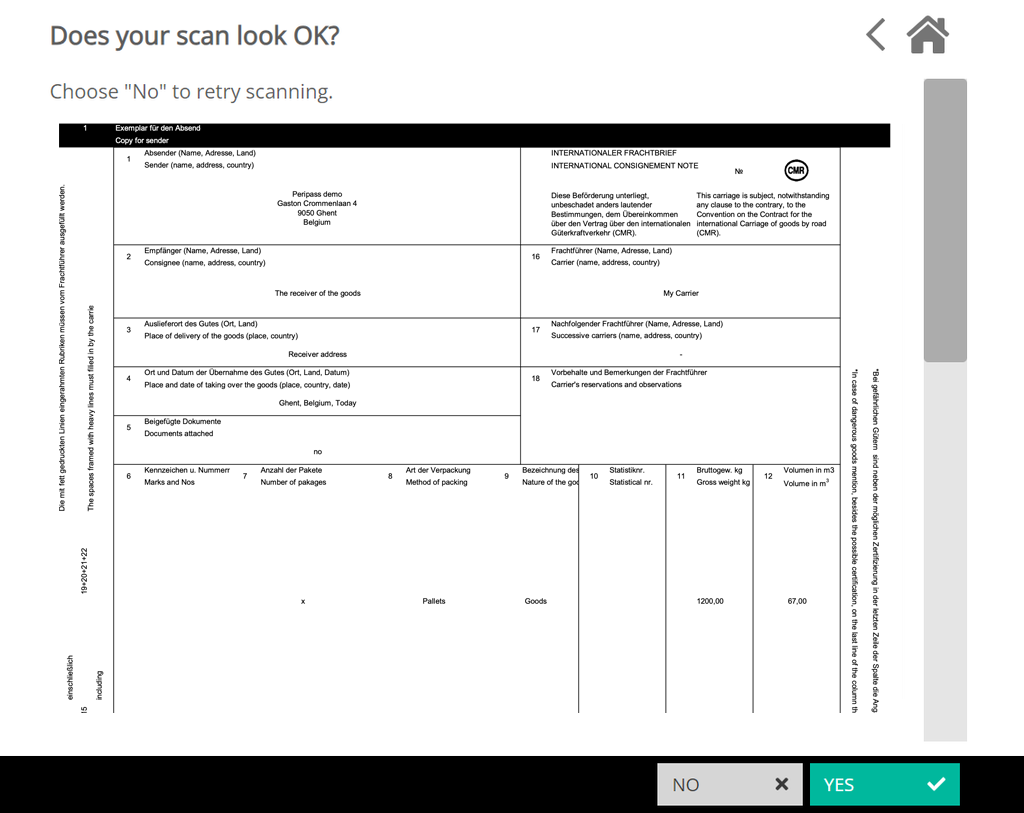 |
Optional: scan another page for the same document. | |
Visitor is reminded to remove the document from the scanner. | 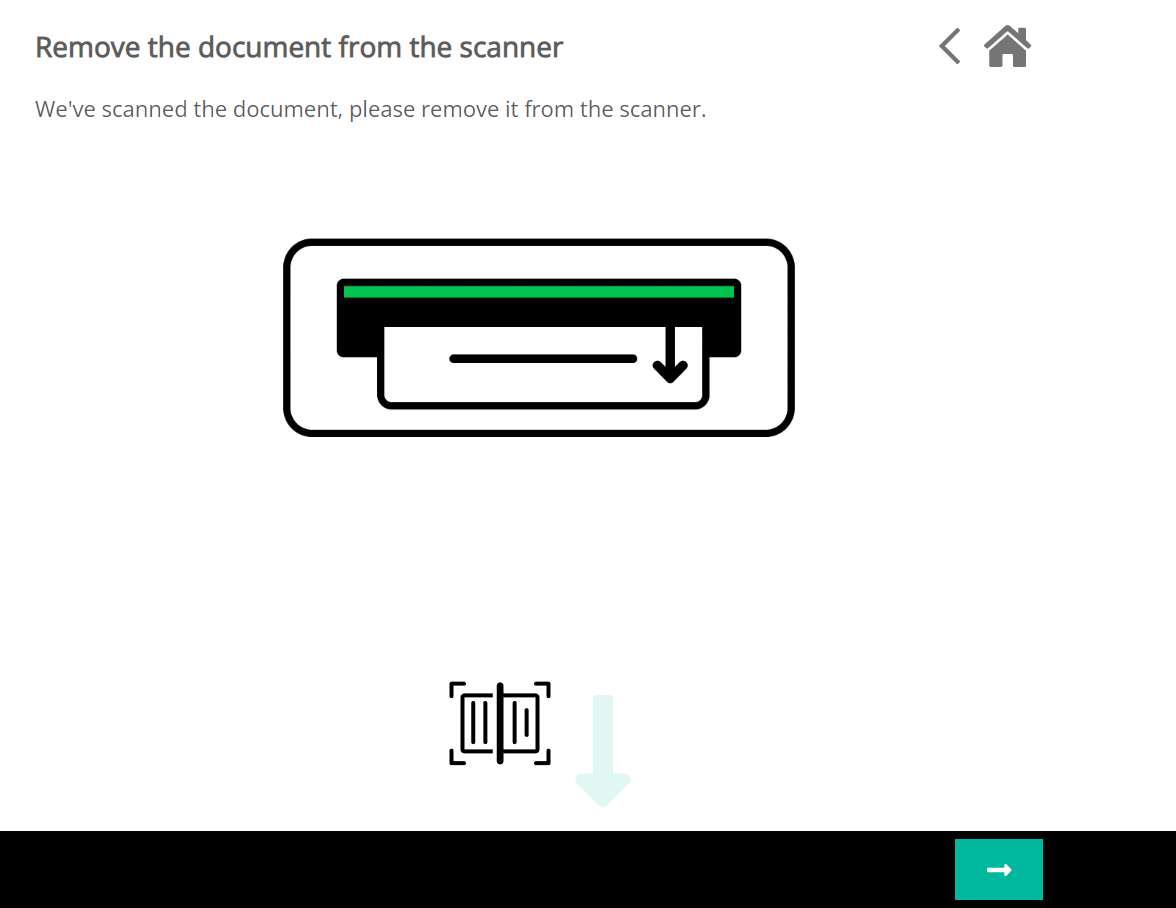 |
Exception flow: if there is an issues with scanning the visitor will see an error message. |  |
Note: document scanning is only initiated when it is enabled on the profile AND the kiosk has scanner hardware configured. When no scanner hardware is configured, the flow will be skipped with no error message.
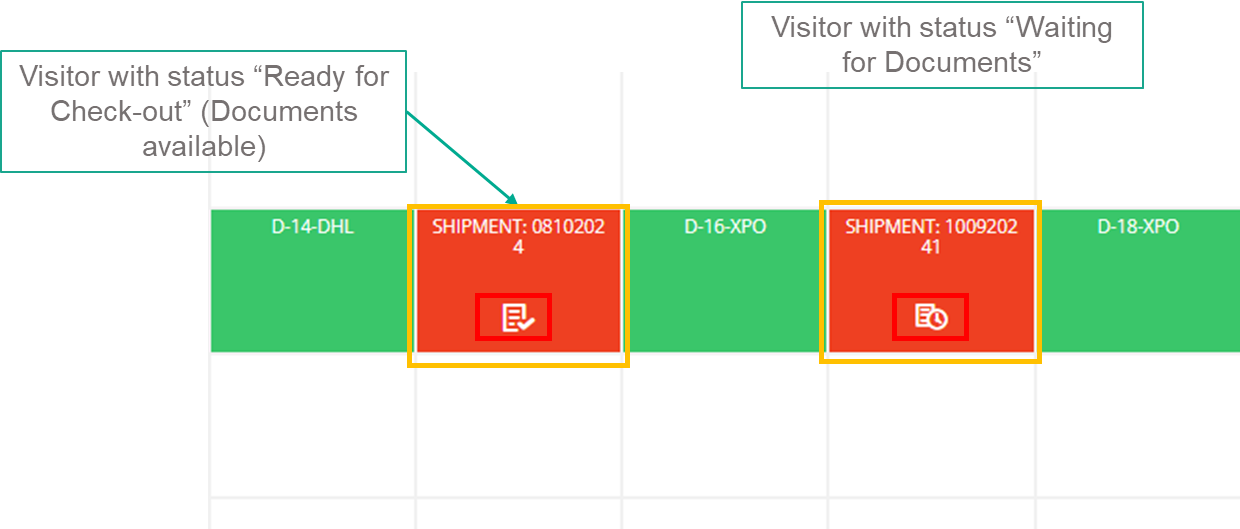
Inform drivers when their documents are ready
Drivers will be informed by an SMS message when they transition to the status READY FOR CHECK OUT .
To end in this status, you need to do 2 things:
Finish the yard operation
Finishing the yard operation will either transition your visitor to the WAITING FOR DOCUMENTS. If you have uploaded all required documents already, then it will immediately proceed to READY FOR CHECK OUT.
Upload all required documents
Once all documents are uploaded, Peripass will automatically transition your visitor from WAITING FOR DOCUMENTS to READY FOR CHECK OUT.
See above to learn where to find the required documents of a visitor.
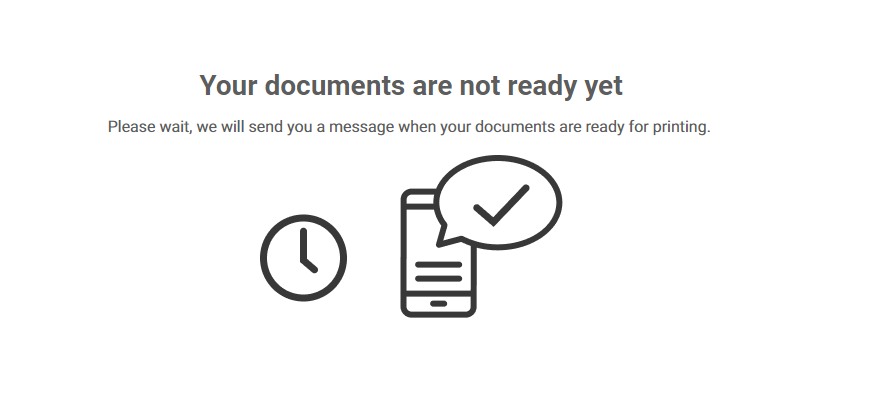
As long as you have not uploaded all required documents, it will also not be possible to initiate a check out process. The visitor will see this message on the kiosk:
This is how the 2 statuses above will be shown on the dispatch dashboard:
More on status changes: Visitor status flow.
Sign documents during check out
During check out, the visitor can be asked to sign documents. This flow has following steps:
Steps | How it looks on the kiosk |
|---|---|
Visitor is shown a preview of the document that needs a signature. | 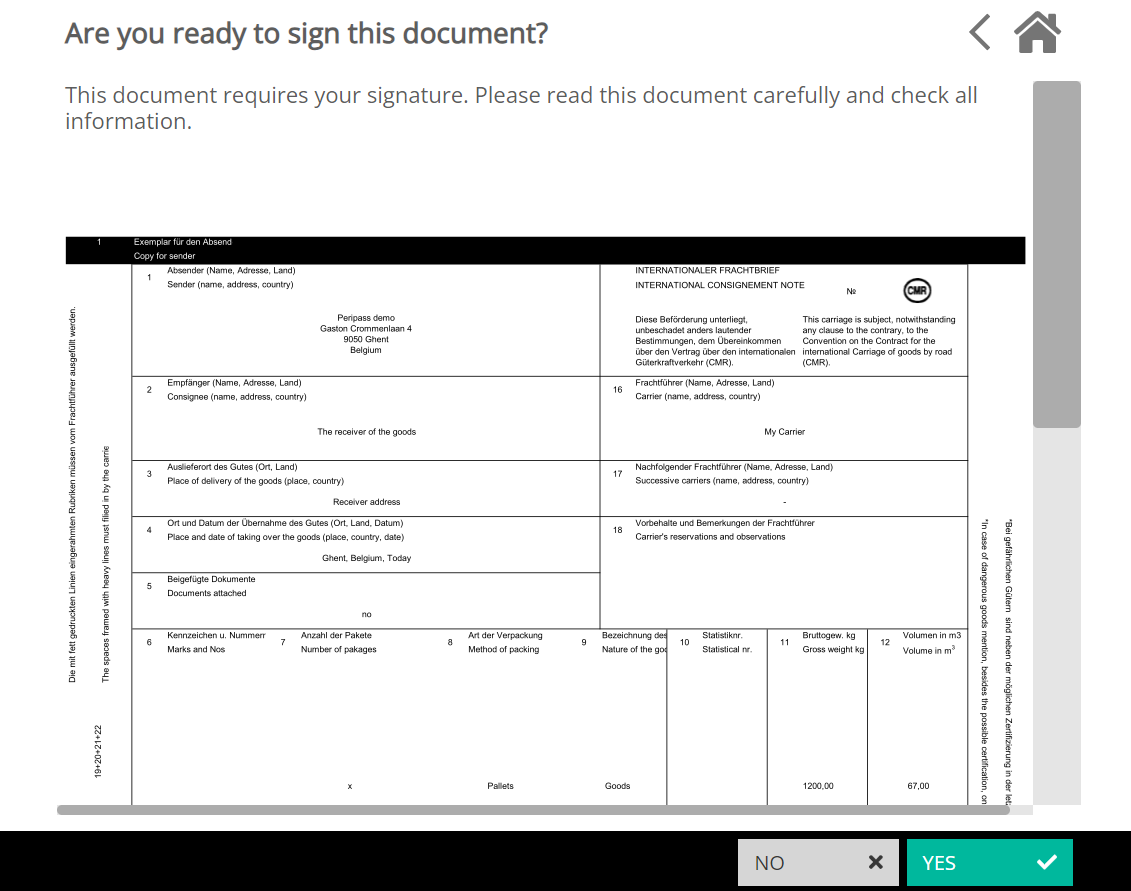 |
Visitor needs to provide their full name | 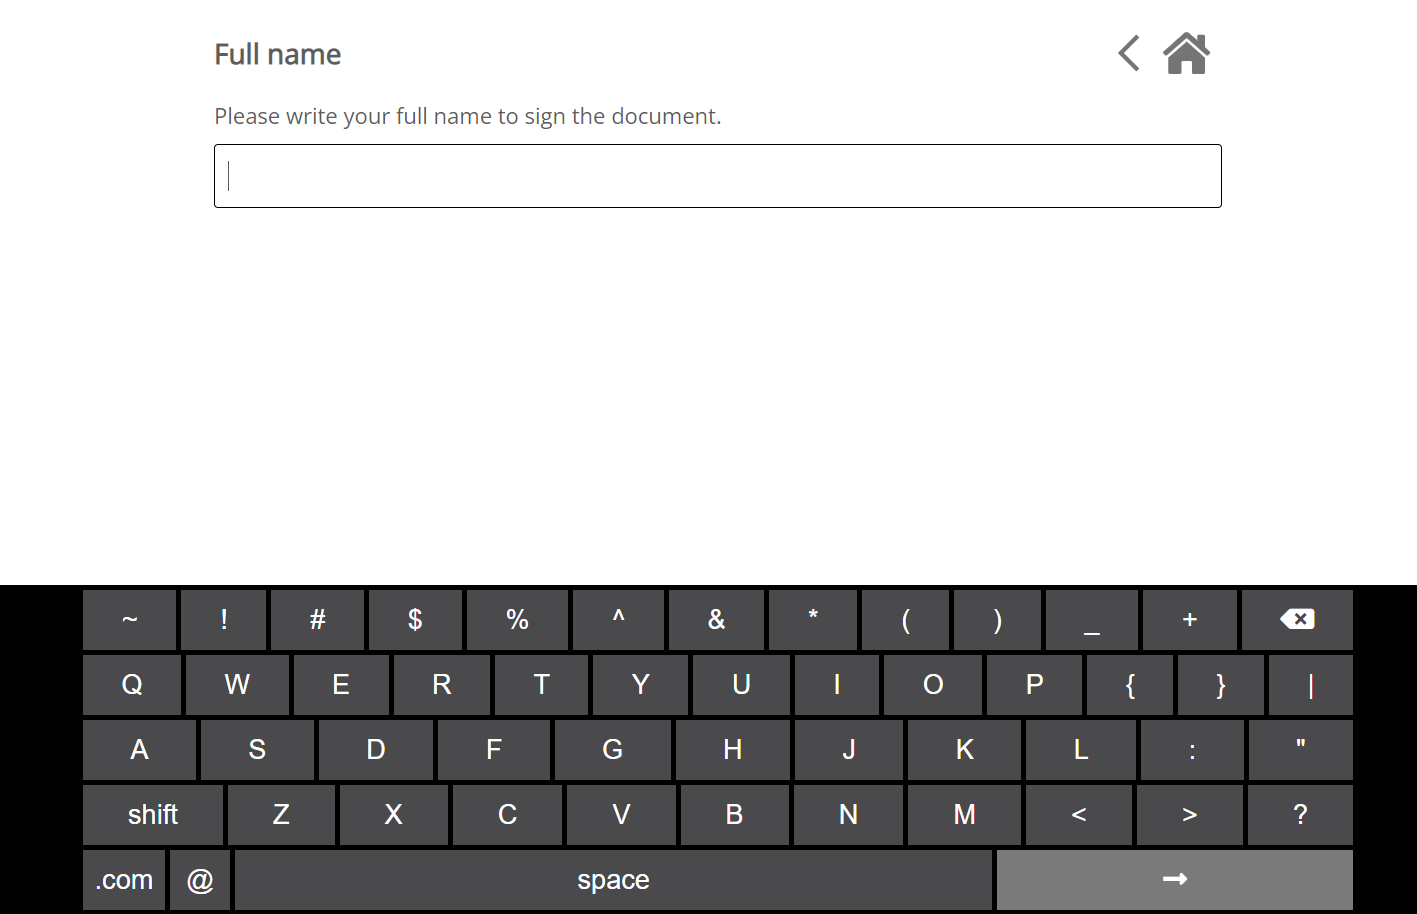 |
Visitor needs to add a signature | 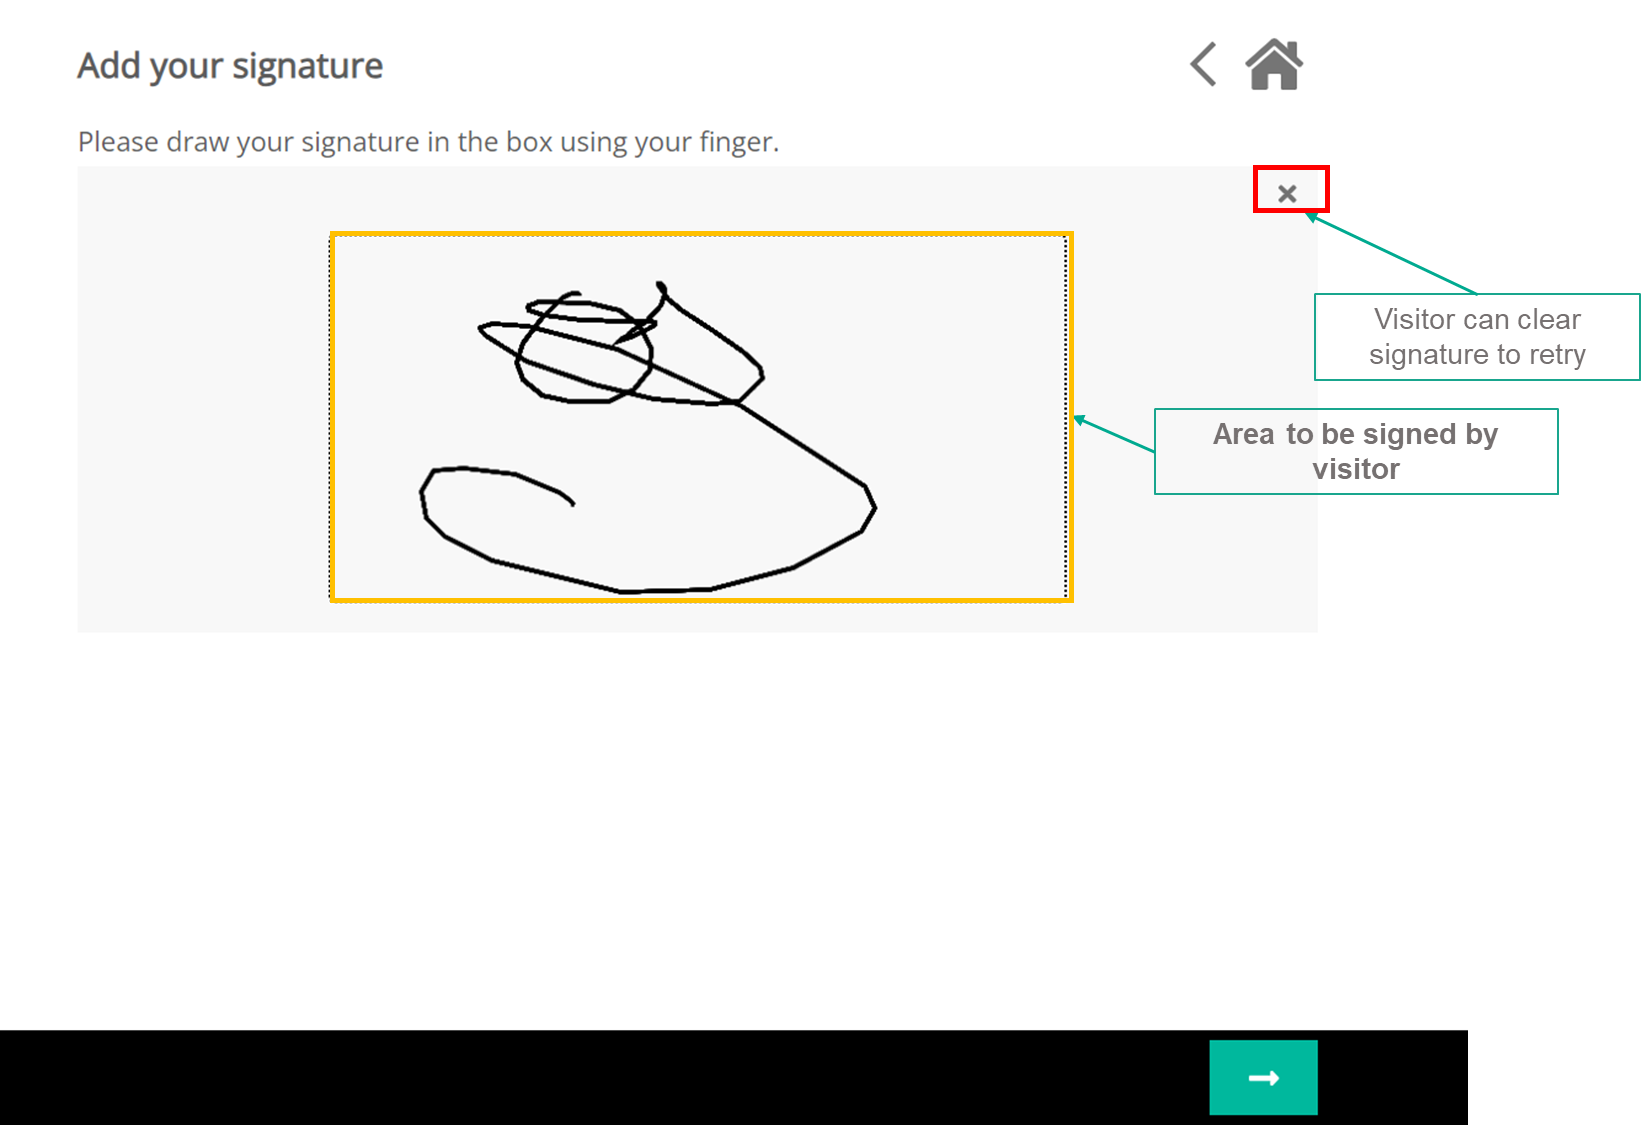 |
The visitor needs to confirm the document including their signature. | 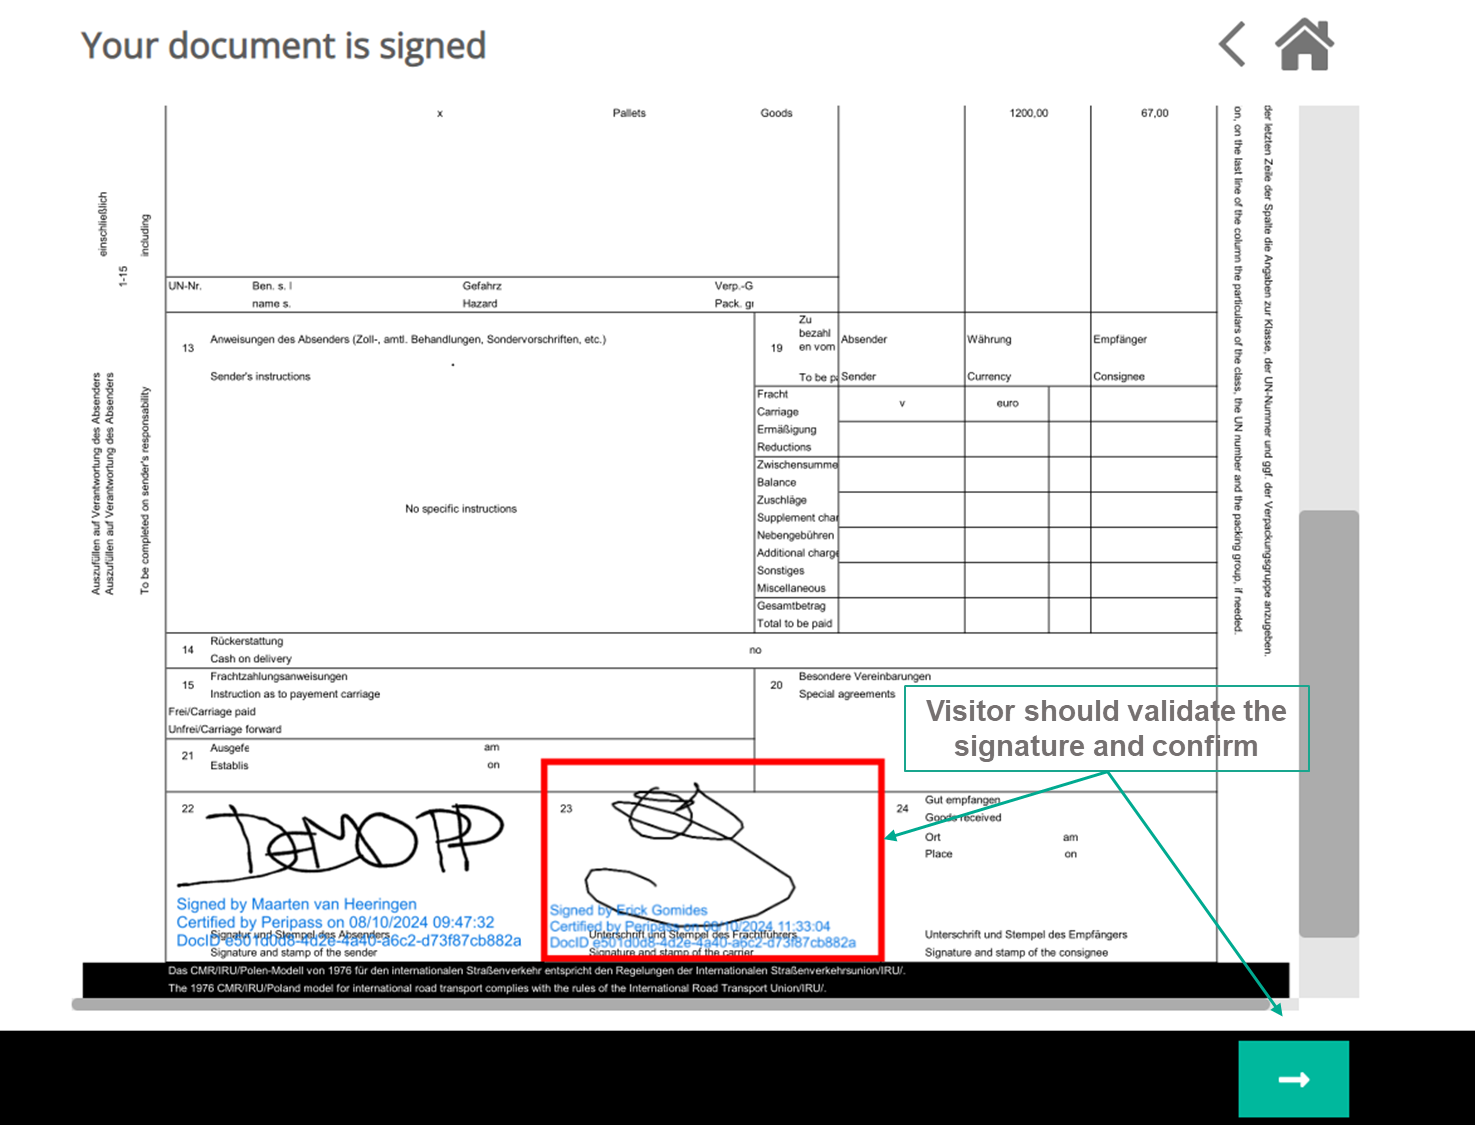 |
Print documents during check out
During check out, the visitor can be asked to print documents. This flow has following steps:
Steps | How it looks on the kiosk |
|---|---|
Printing in progress | 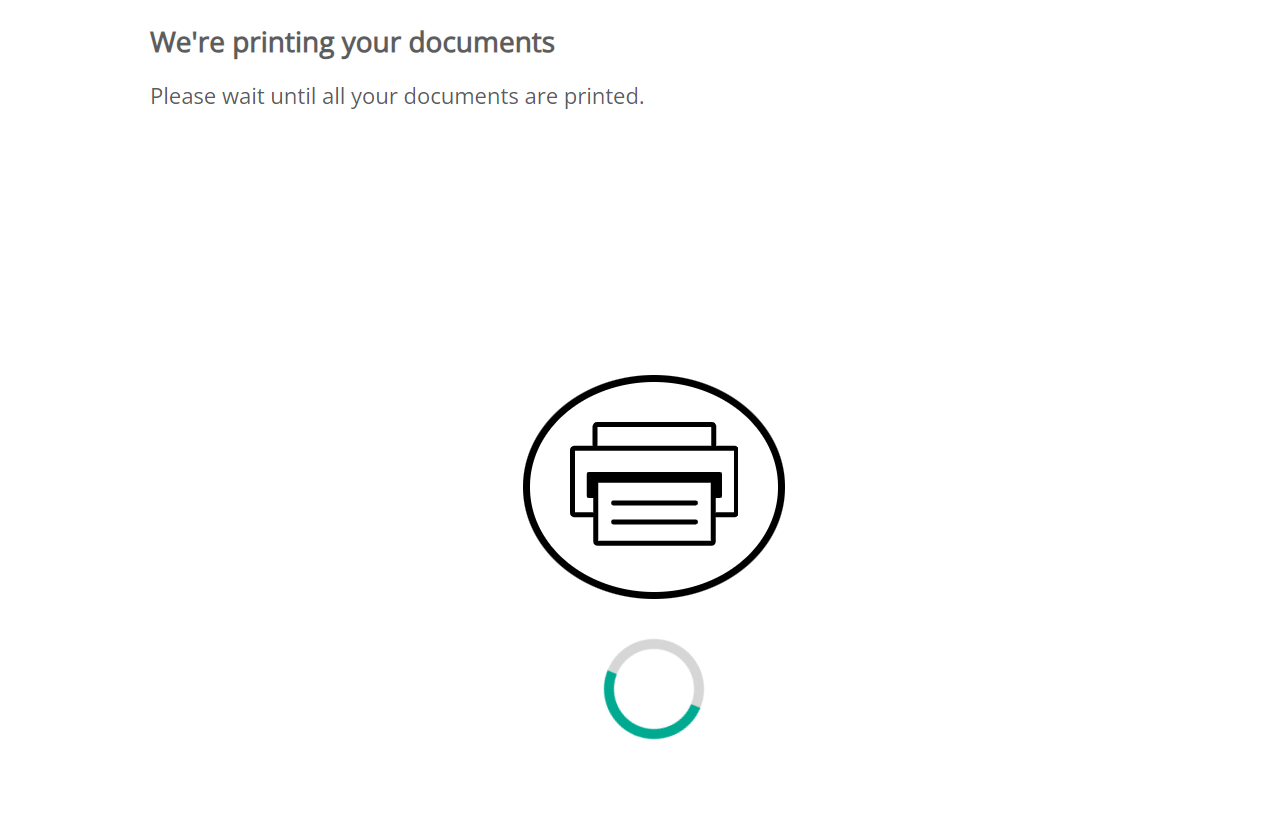 |
Optional: Visitor is asked to confirm they received all documents. Typically used to confirm customs documents are received, to avoid issues later during the transport. This might be important if it is very important to the driver Warning: this step should only be used in combination with barriers, preventing the drivers to leave before accepting. If this would be the case, the check out flow will timeout and check out won’t be completed. | 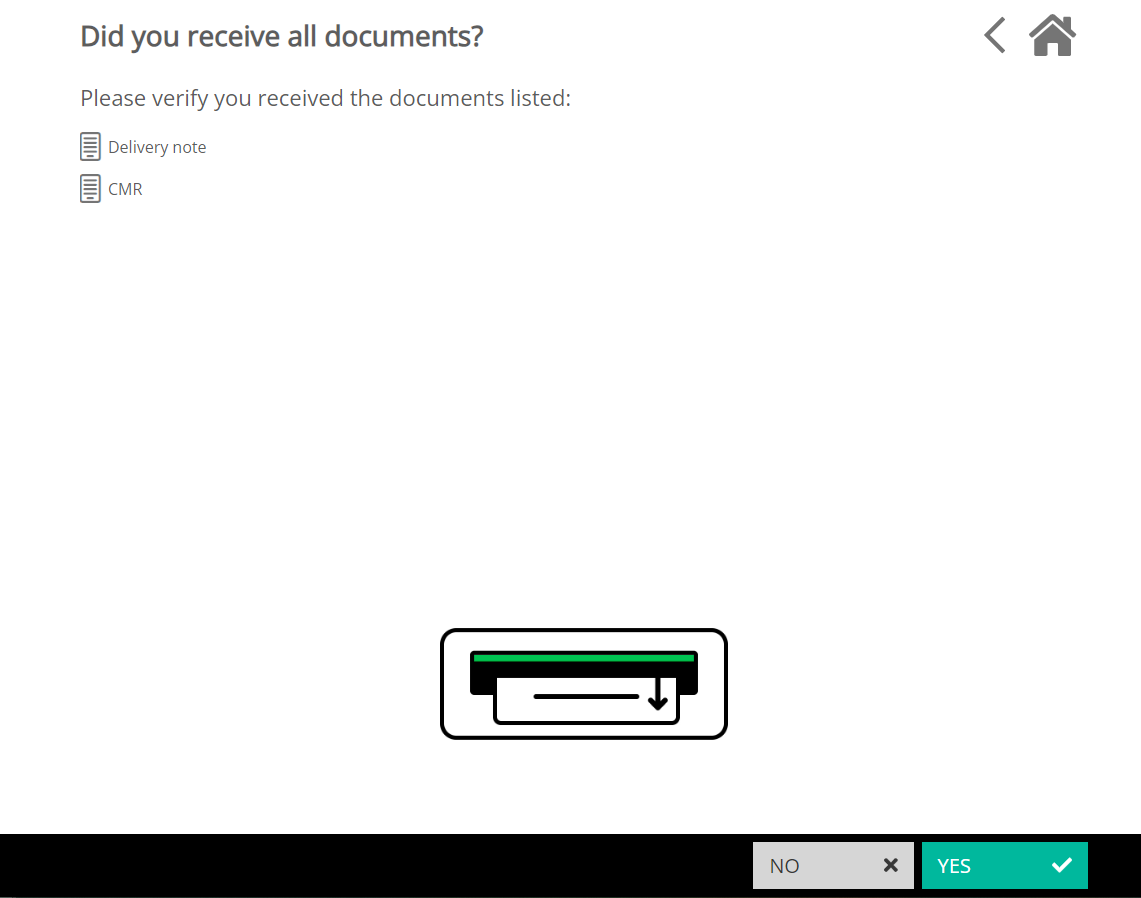 |
Note: When the visitor is checking out on a kiosk that does not have a printer configured, the printing will be skipped. If you want to limit visitors to check-out on these types of kiosks, you have to change the profiles that are enabled for check-out on that kiosk: Check out process | Limit-visitor-that-are-allowed-to-check-out-on-this-kiosk
Printing at any time (using Triggers Actions)
You can use the action “print documents” to print at any desired moment on a printer in an office or in your production / warehouse. More information:Actions
Email or SMS documents
You can use the action “Send email” or “Send SMS message” to communicate a link to the document. Use an autofill fields to add the link to your message. More information:Actions
Document storage lifetime
See: Data retention policies and storage limitations
Known limitations
Document generation. The required documents are created externally and uploaded; either manually or through the API.
Having the visitor add comments on check-out (observations and reservations) is not possible. Whenever comments are required, we assume a discussion between someone from the transport desk and the driver will be required.
Signing by the transport desk is restricted to the signature of the user uploading the document. It is not possible to have someone sign by the transport desk using the management portal, nor through the API.
It is not possible to scan documents on check out.
How to set up
Create your document type: Configuration > Document types > Create
There are some other features and possibilities available, like printing some documents always 2-sided (BOL) and others always 1-sided (CMR).
Enable your flows on your profile: Configuration > Profiles > Edit > Document types > Add or Edit > Scan on kiosk section.
There are some other features and possibilities available, like printing or scanning multiple pages.
Enable the hardware on your kiosk: Configuration > Self-service kiosks > Edit > Scanning configuration or check-out configuration.
The kiosk is not directly communicating with the scanner and printer but queues this commands via the Local Action Worker. Therefore the scanner and printer should be in the same network as the Local Action Worker.
Set up sign during check out (by drivers)
You should configure where signatures are added on your document. This is configured here: Configuration > Document types > Create
Set up sign on upload (by transport desk)
You should configure where signatures are added on your document. This is configured here: Configuration > Document types > Create
To allow a user to sign on upload, you should add a signature to this user. This can be added via Configuration > Users > Edit > Extra information tab.
There exist free online tools like https://www.signwell.com/online-signature/draw/ to generate the users' signature image to upload to the user in Peripass. We advise a transparent background for the best user experience.
Note: we do not support sign on upload (by transport desk) for documents uploaded by the API. We assume in this case the 3rd party responsible for uploading the document knows who approved it and thus that systems adds the transport desk signature.
Set up Automation
Document handling is embedded in Triggers & Actions :
A condition can check for the existence of a specific workflow document on a visitor.
An action can print a specific workflow document to a known printer installed on the local server.
An action can email a list of attached workflow documents
An action can send an url that expires after 10 days
Explore more
Troubleshooting
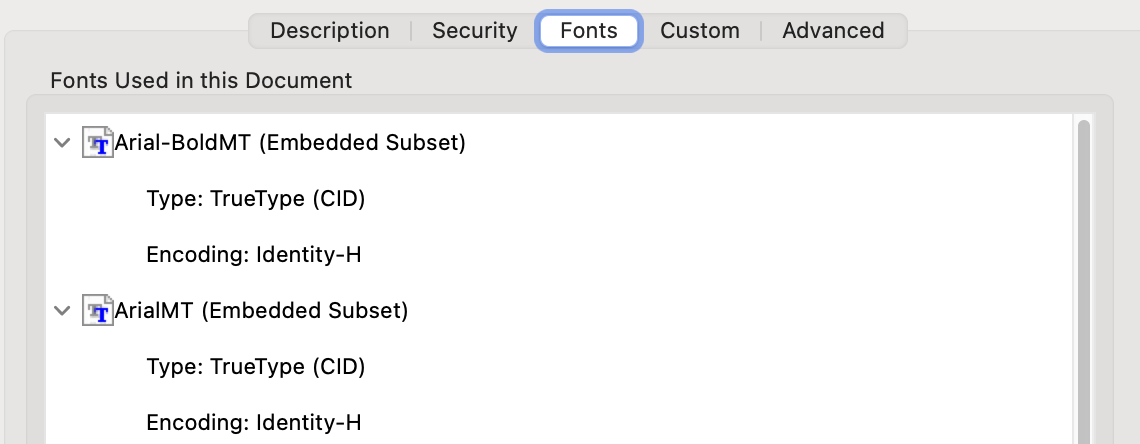
My file does not show text on the kiosk?
This is because the pdf file does not have fonts embedded. You must embed the fonts in the PDF to ensure they print properly. You can verify whether your pdf has embedded fonts by using acrobat reader:
File > Document properties > Fonts
When a font should mentions “Embedded Subset”, it is embedded in the pdf