Sharepoint integration using Power Automate
When do you need this
Setup and maintenance of power automate is not the responsibility of Peripass
This article only explains how a possible solution could be implemented.
When you customer has no budget provide an custom integration and they want to use an excel hosted on a Sharepoint to automate some part of the visitor uploads.
Main idea
We will set up a flow in Power Automate that is going to monitor a file in your Sharepoint and communicate changes to Peripass.
Won’t do / limitations
The Power Automate flow can be triggered by file changes in a folder, but at that point doesn’t yet know what changes were made. This means we have to work with a check column that informs Power Automate on whether a certain row has already been sent to Peripass or not. Therefore, the file customers use must conform to a certain layout.
HTTP calls with Power Automate require a premium account.
How to setup
An example Excel file can be found in the Product Peripass SharePoint under Documents > Import Power Automate (link). This excel is linked to the training environment. If you are part of the Product Peripass team, the example flow should also be visible in Power Automate under My flows > Shared with me.
Configure Sharepoint
In your Sharepoint, add a folder that will only contain the Excel file which Power Automate needs to check for updates.
Add the Excel file containing the data you wish to send to Peripass in that folder.
Configure Power Automate Cloud
First of all, make sure your Excel file contains both a table and a column within that table called “Processed”. For all rows that still need processing you set this column to “No”.
To avoid that multiple runs are being triggered at the same, causing duplicate visitors to be created, set following parameters:
Go to “settings”
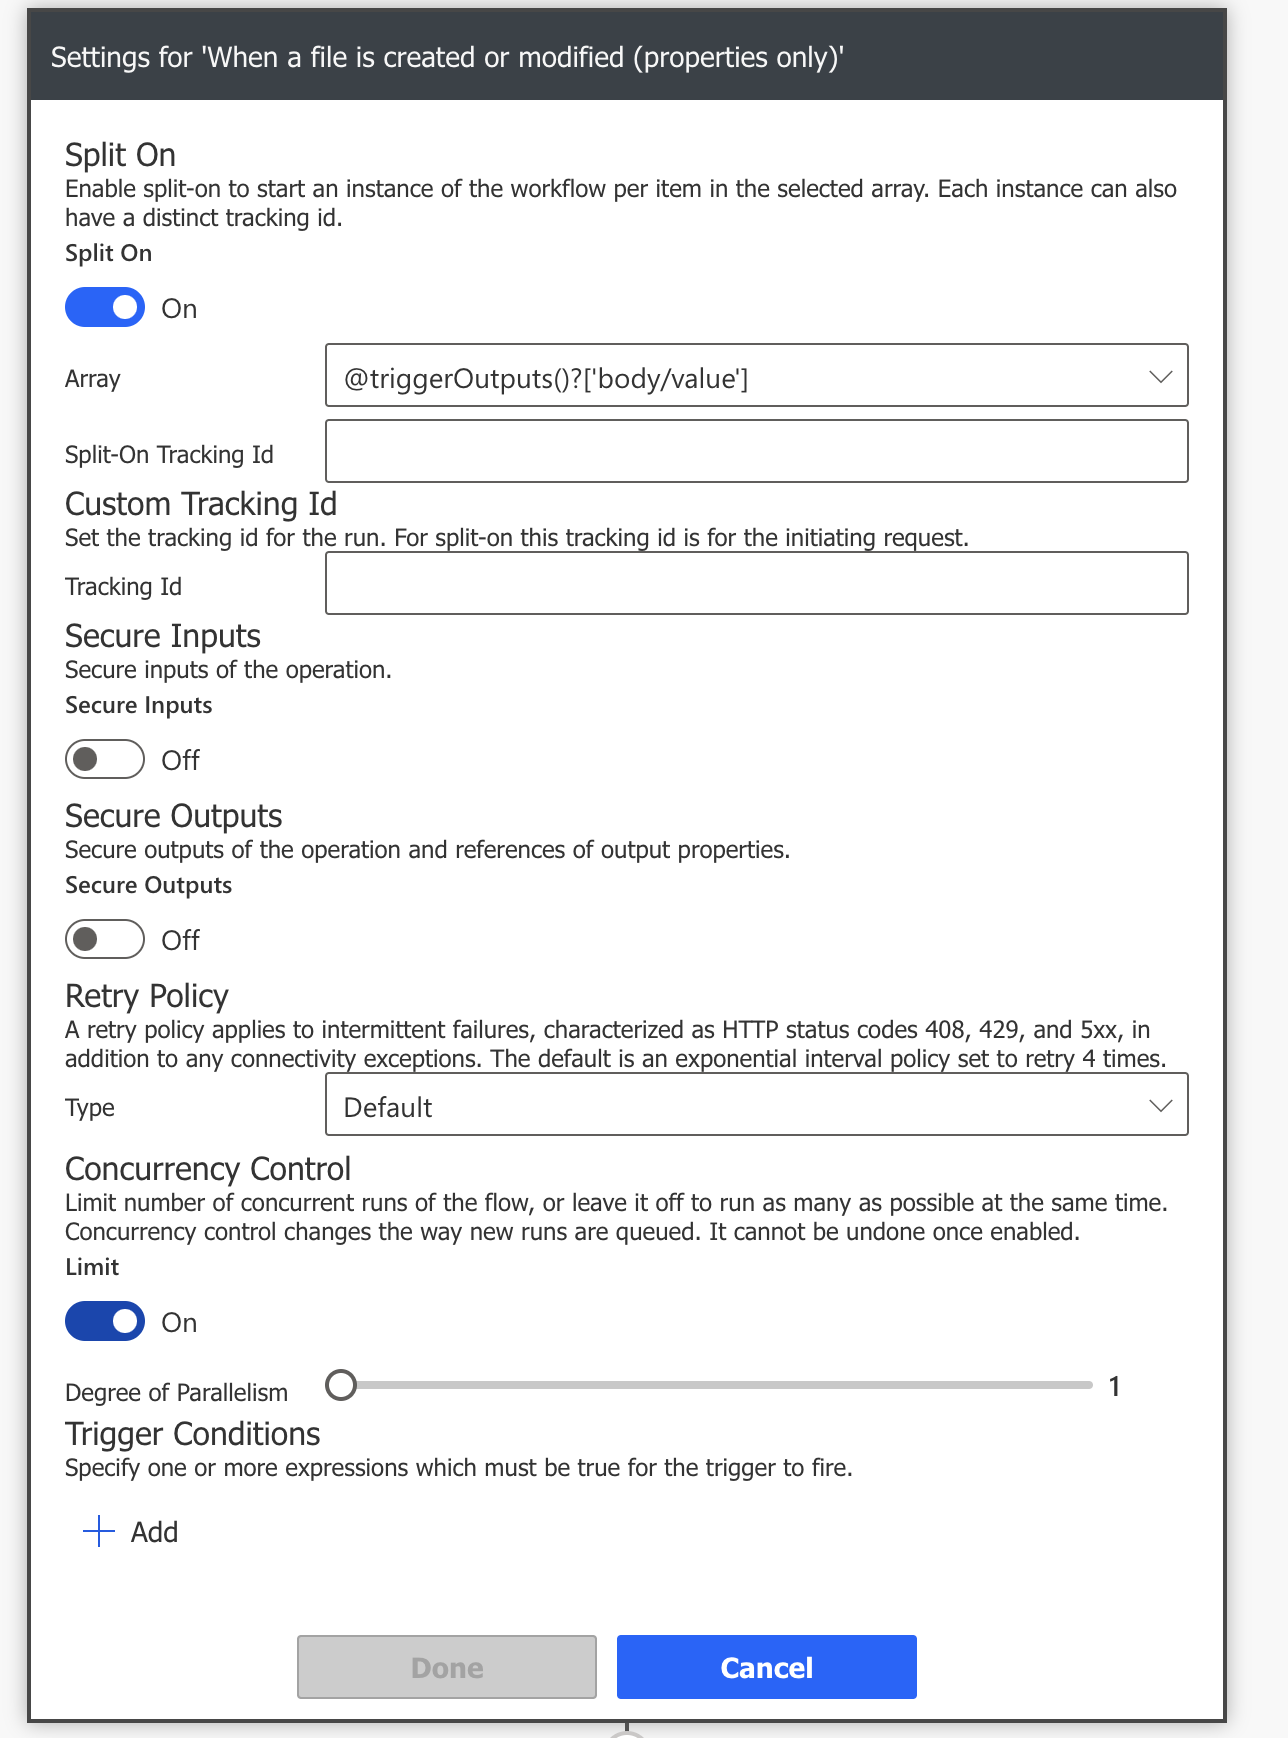
Set within the “Concurrency control” the “degree of Parallelism” to 0
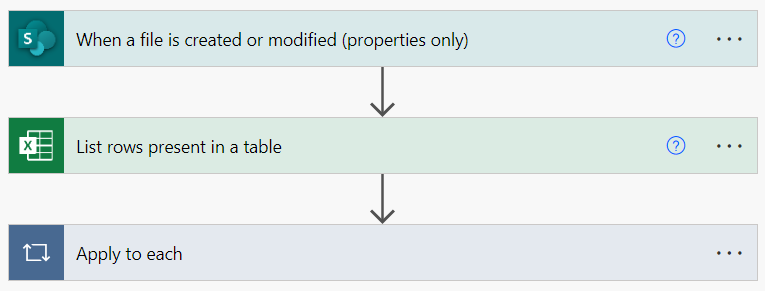
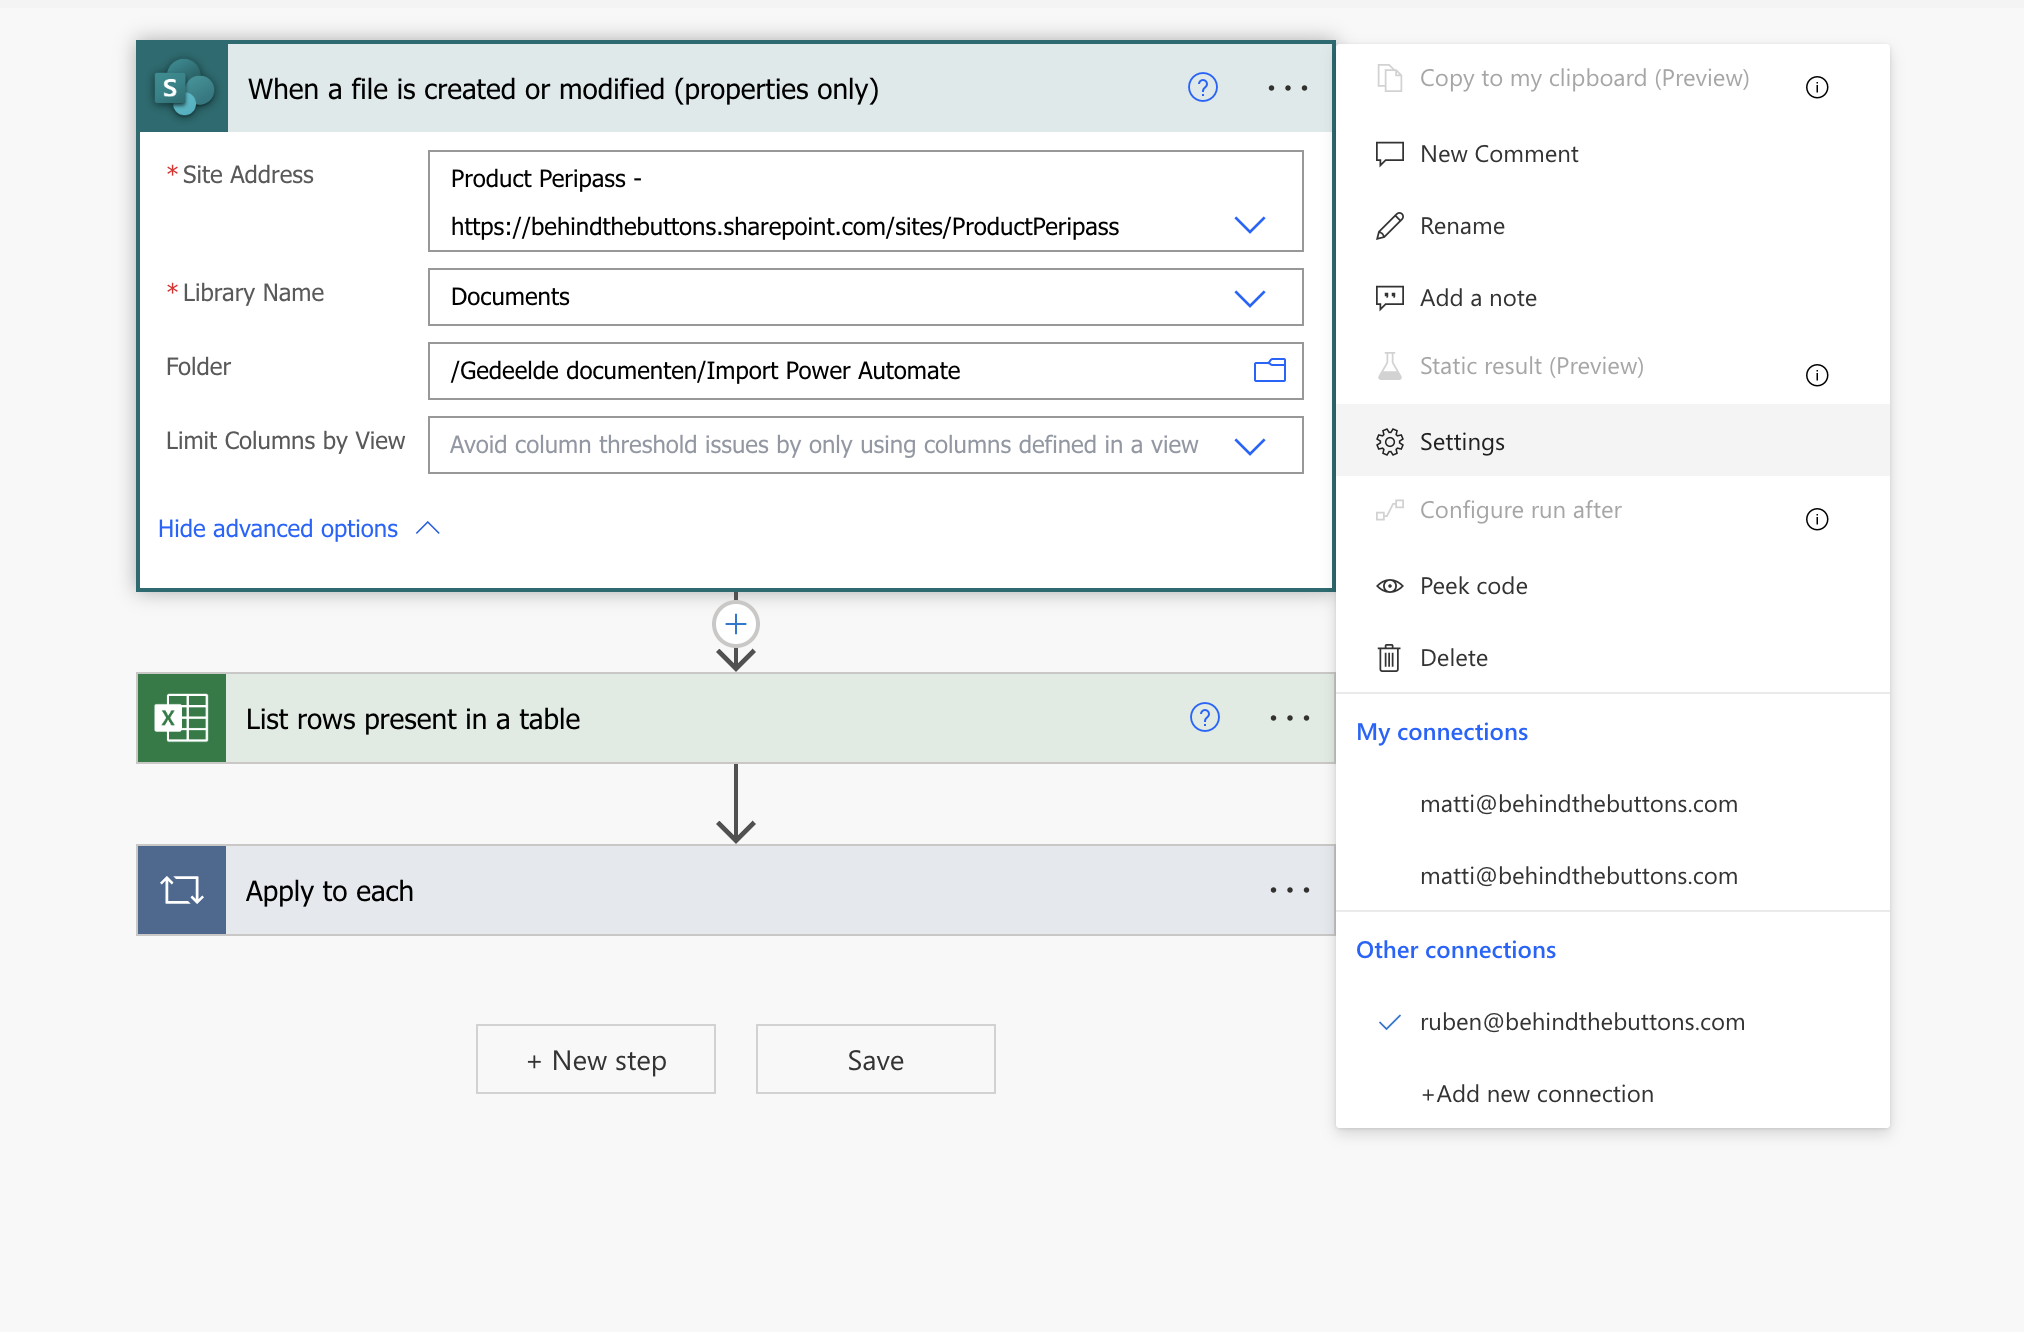
As the trigger, choose Sharepoint’s “When a file is created or modified (properties only)” and fill out the required info regarding your Sharepoint. In the “Folder” section, choose the designated folder you will use for storing your Excel file.
Next, add the Excel Online (Business) action “List rows present in a table”. Again, fill out the necessary info on where in your Sharepoint Power Automate can find your file. Under advanced options set DateTime Format to ISO 8601.
Then, under Control select the “Apply to each” action. In the first field, we will put the output of the “List rows present in a table” action as follows:
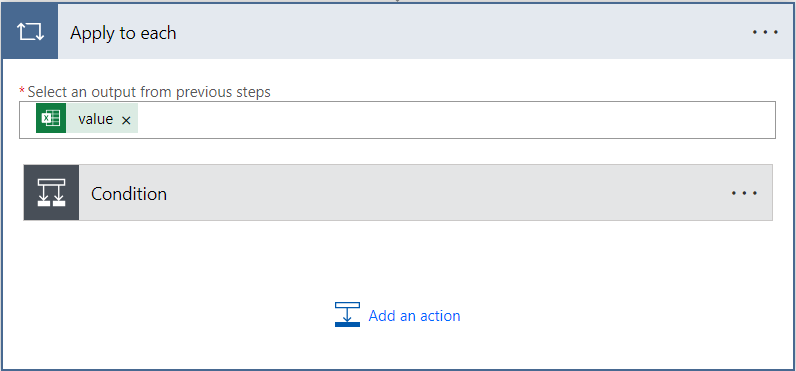
Then we will add an if condition as can be seen in the following screenshot:
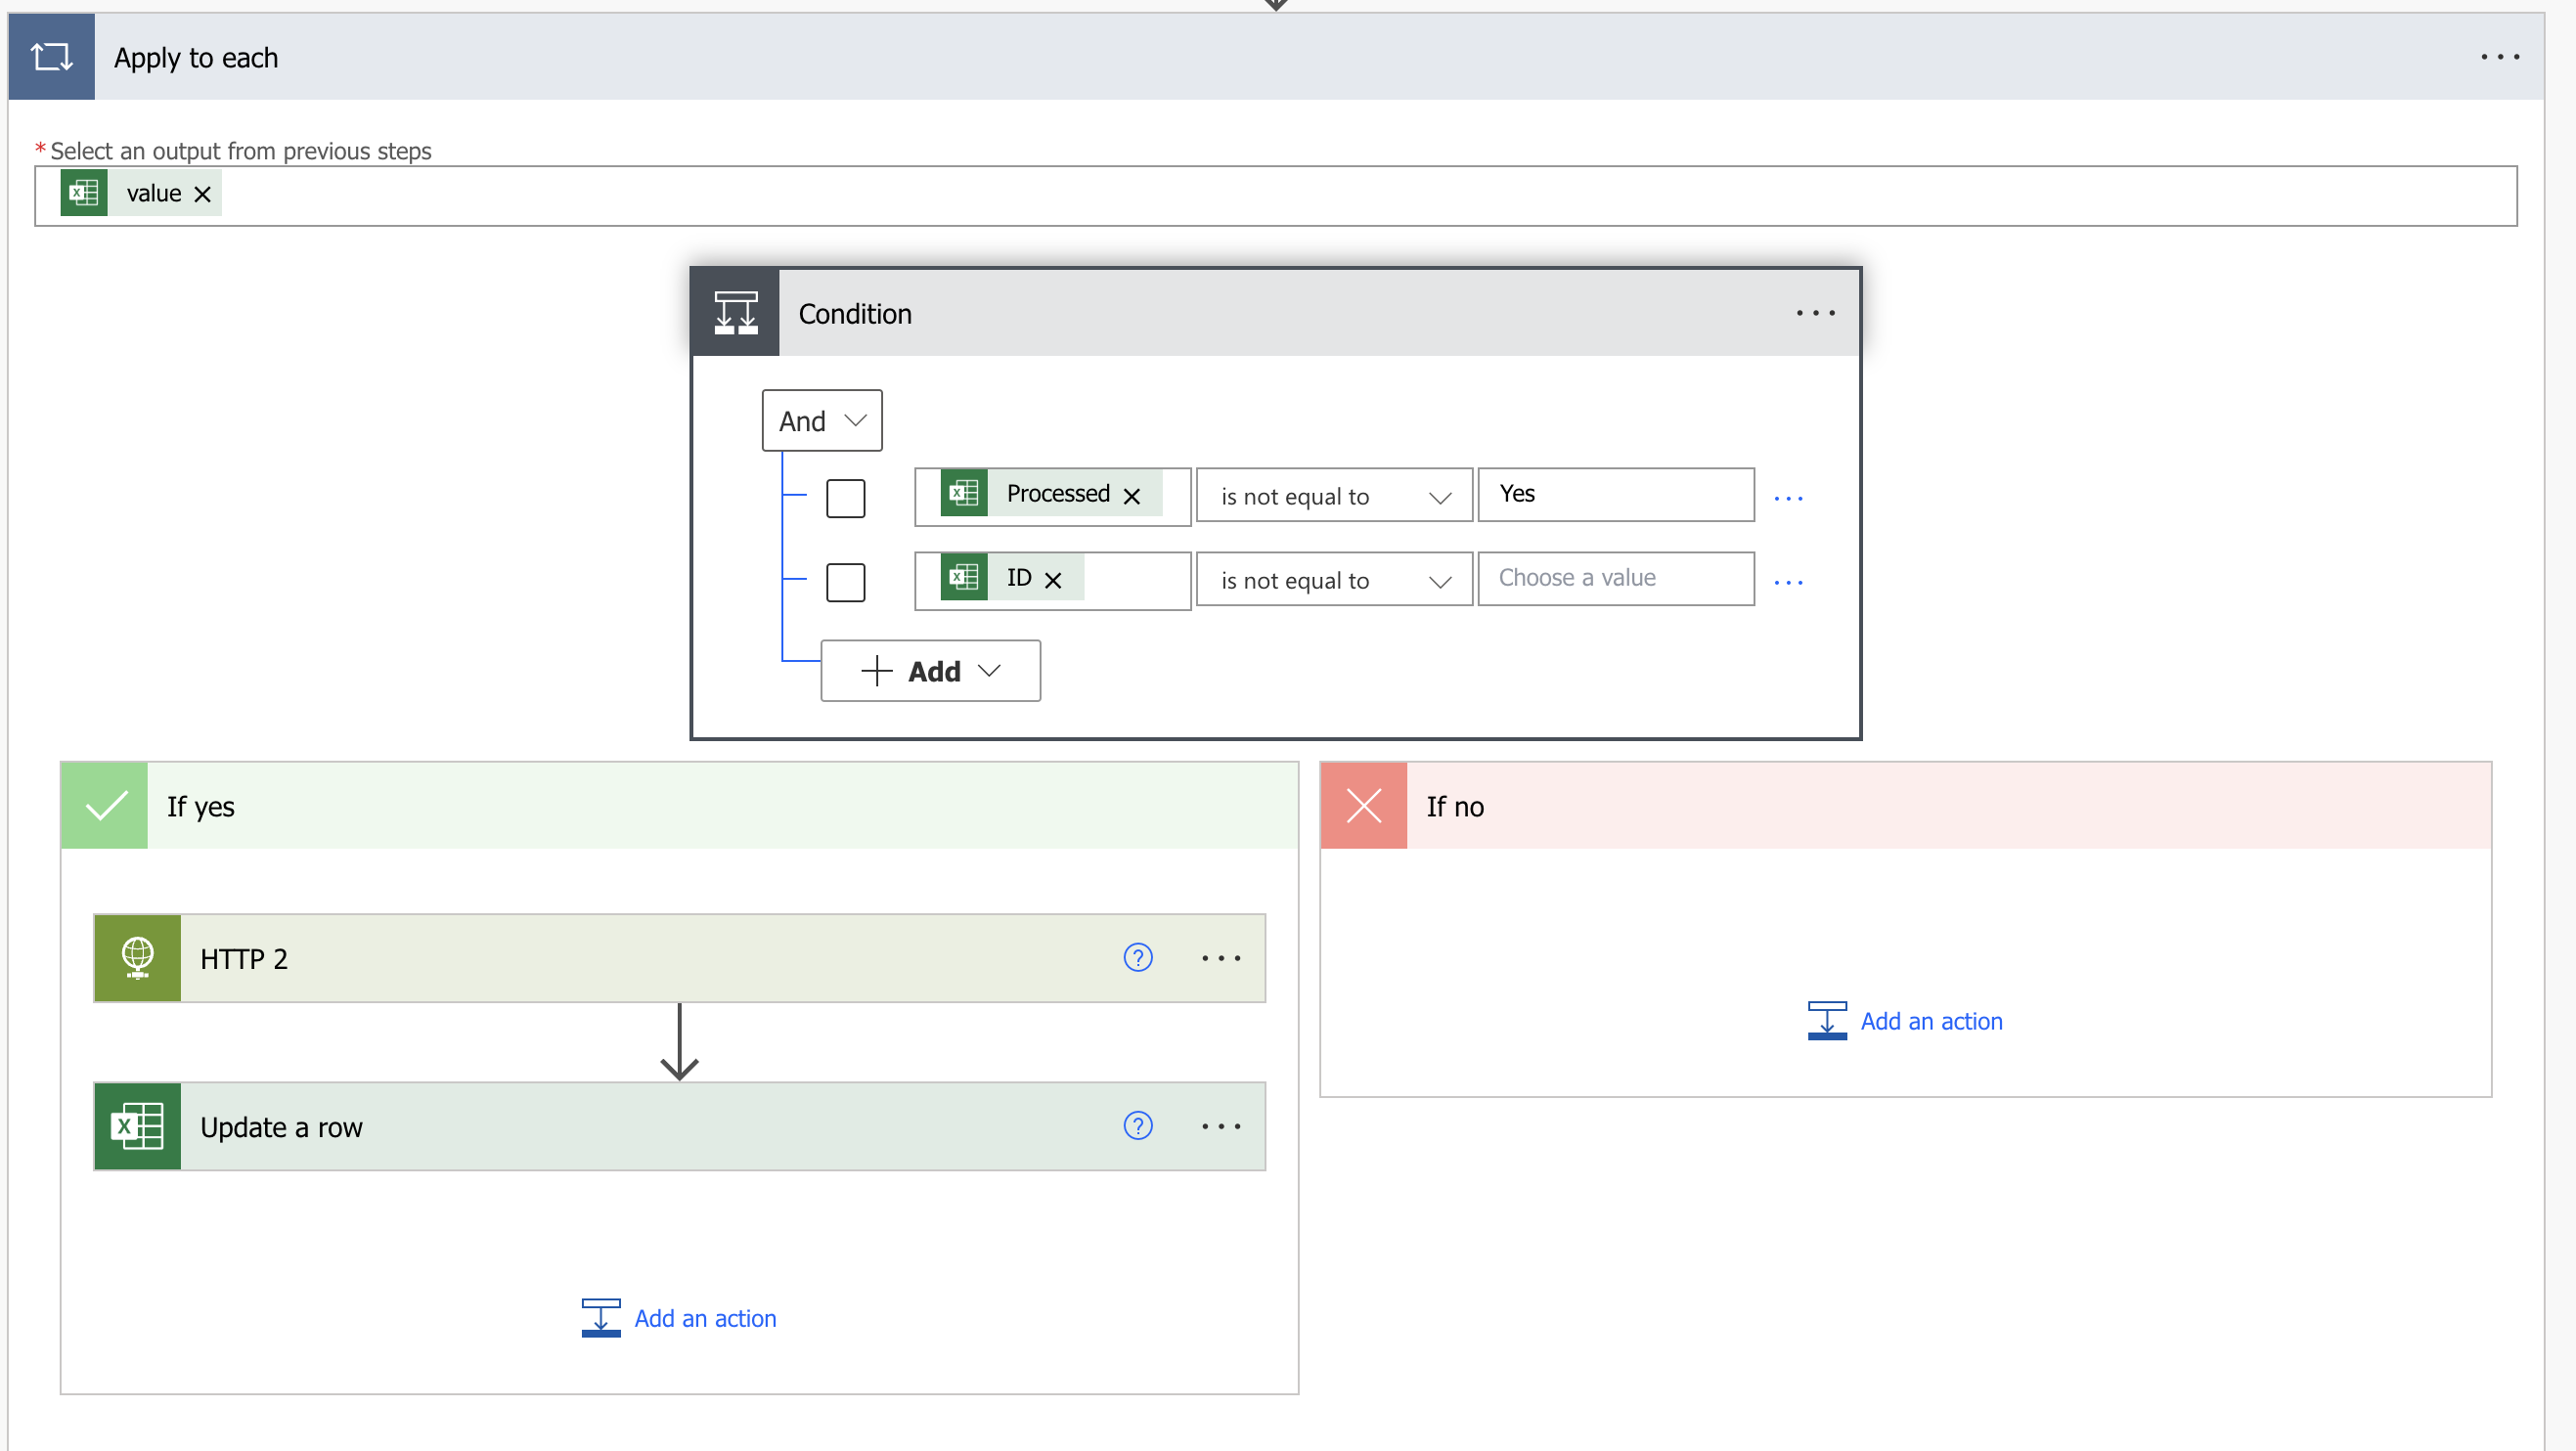
Under “If yes”, we’re first going to insert a HTTP action. This action should be set up like in the screenshot below (Note that you should still replace <tenant> and input your own API key after “x-api-key”):
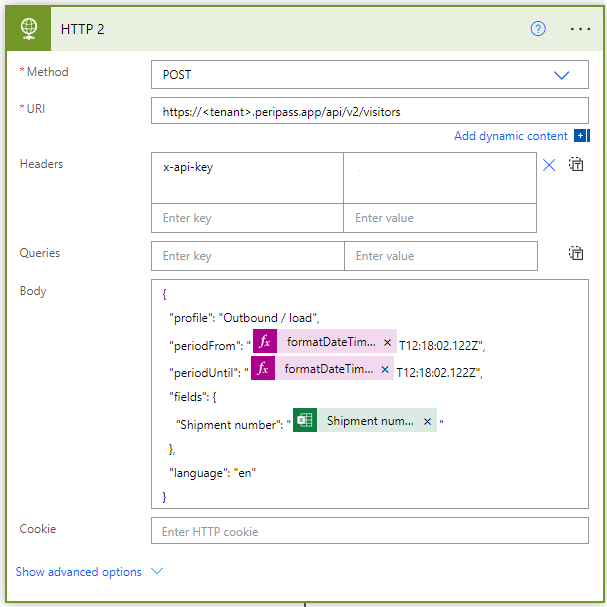
As a body you can use the exact snippet below, or alter it to contain the extra fields you want.
{
"profile": "Outbound / load",
"periodFrom": "@{formatDateTime(item()?['<insert date column name>'], 'yyyy-MM-dd')}T12:18:02.122Z",
"periodUntil": "@{formatDateTime(item()?['<insert date column name>'], 'yyyy-MM-dd')}T12:18:02.122Z",
"fields": {
"Shipment number": "<insert column link>"
},
"language": "en"
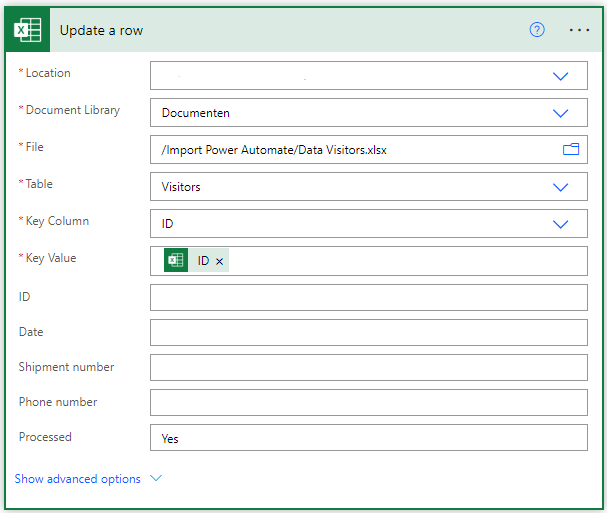
}Lastly, we are going to add an “Update a row” action that will change the “Processed” column of the rows that have been sent to Peripass to “Yes” (Note that the “Location” field in the screenshot should be the link to your Sharepoint).