Event alerter (buzzer & light)
When do you need this
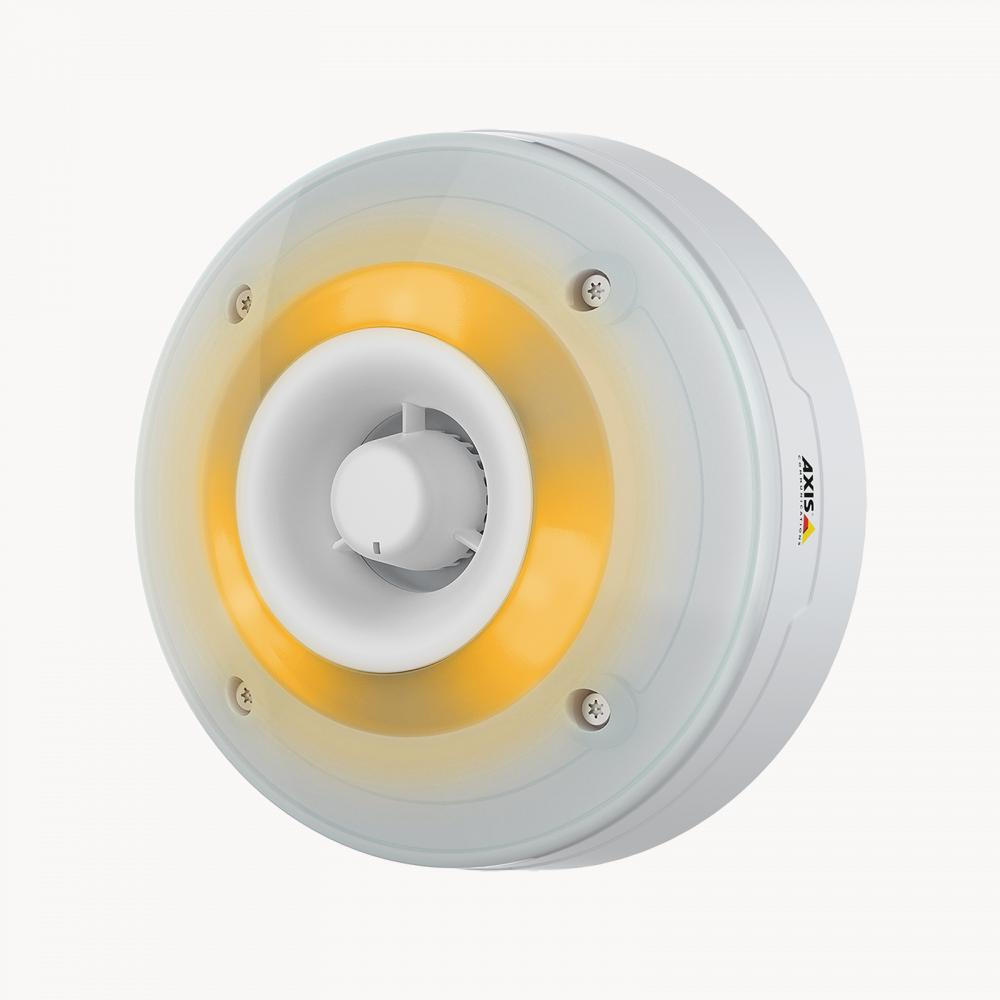
When you want to alert employees and attract their attention to Peripass at certain events, using a physical device with light and sound alerting abilities. This is mainly used for employees that do not work at their PC all of their time. Some example use cases could be:
Informing employees when a visitor has registered and is waiting for approval.
Informing employees when a visitor has been dispatched to a dock that is out of the line of sight and therefore is often forgotten.
Main idea
Turn on a physical light/buzzer to alert employees at certain events.
This light/buzzer is turned on using Triggers & Actions.
The light/buzzer can be programmed to have different profiles (sound & light combinations) that can be used in different scenario’s.
The light/buzzer technical information can be found here: https://www.axis.com/products/axis-d4100-e-network-strobe-siren
Price indication: +- 500 euro per device
Won’t do
Only events supported by Triggers & Actions are supported to turn on or off the light/buzzer. As a consequence it is not possible to managed the light based on more then 1 visitor.
Example:
Visitor 1 is set to waiting approval. The light is turned on.
Visitor 2 is set to waiting approval. The light is turned on, but was already on. So nothing changes.
Visitor 1 is approved. The light is turned off.
Notice, the light is turned off even though visitor 2 is still in “waiting approval”.
The solution for this limitation is to not turn off the light automatically, but always as a deliberate action using a process step with 2 steps: “Turn light on” and “Turn light off”. This way turning the light off will always be a deliberate action and the user will check whether there are no other visitor to be processed anymore.
How to configure
Basic setup
In order to add Axis D4100 automation to your Peripass yard, you will first have to switch the devices you want to add to Basic authentication. To do this, download Axis Device Manager using this link: https://www.axis.com/support/tools/axis-device-manager . Once this is done, walk through the following steps:
Basic authentication with firmware below 7.20:
Add the new device to AXIS Device Manager with default settings, i.e. HTTPS has not been enabled on the device.
In Configure Device, change the authentication policy of the device by changing the following parameter:
Network.HTTP.AuthenticationPolicy = basic
Apply the configuration to the device. The status column will change to "HTTP & HTTPS failed" or "Password type: unencrypted".
Remove the device from AXIS Device Manager and restart the computer hosting the AXIS Device Manager server or delete all the AXIS Device Manager databases located at C:\ProgramData\Axis Communications\AXIS Device Manager Server while the AXIS Device manager service is stopped.
Note: Deleting the databases will erase all configuration done in AXIS Device Manager and all added devices. If this is not acceptable, choose to restart the computer instead.
Discover and add the device again. Status during discovery should be "Enter password (unencrypted)". This means Basic authentication is now used.
Basic authentication with firmware 7.20 and above:
Add the new device to AXIS Device Manager with default settings, i.e. a self-signed certificate is already uploaded and connection policy is set to HTTP & HTTPS.
Select the device in AXIS Device Manager and, in the context menu choose Security > HTTPS > Disable. The HTTPS column will change to Disabled.
In Configure Device, change the authentication policy of the device by changing the following parameter:
Network.HTTP.AuthenticationPolicy = basic
Apply the configuration to the device. The status column will change to "HTTP & HTTPS failed" or "Password type: unencrypted".
Remove the device from AXIS Device Manager and restart the computer hosting the AXIS Device Manager server or delete all the AXIS Device Manager databases located at C:\ProgramData\Axis Communications\AXIS Device Manager Server while the AXIS Device manager service is stopped.
Note: Deleting the databases will erase all configuration done in AXIS Device Manager and all added devices. If this is not acceptable, choose to restart the computer instead.
Discover and add the devices again. Status during discovery should be "Enter password (unencrypted)". This means Basic authentication is now used.
Adding a Profile to your Axis device
These steps will help you set up a profile that will be executed as a notification when a trigger is activated in Peripass. If you want, you can create several profiles for different Peripass notifications.
In your browser, go to the IP address of your device.
Log in.
Once logged in, select “Profiles” in the sidebar.

Here, you can create the profile you want to be executed for a certain trigger.
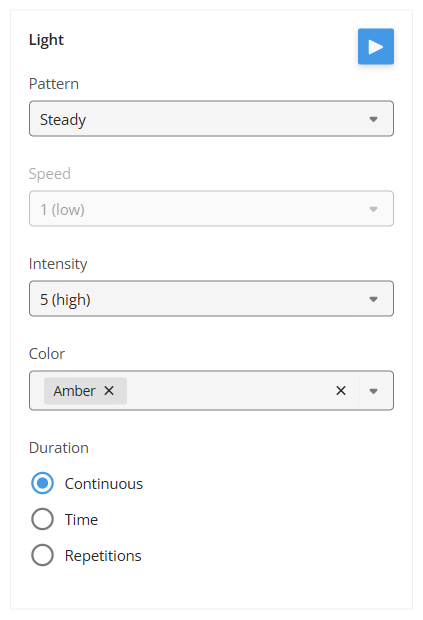
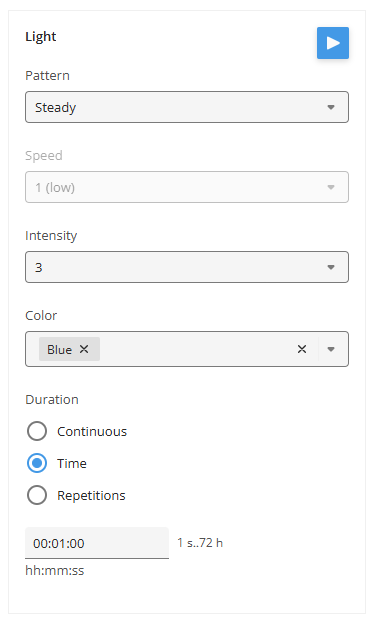
Example Light profiles
Permanent steady amber signal:
Steady blue signal for 1 minute duration:
Pulsing green signal for 3 repetitions:
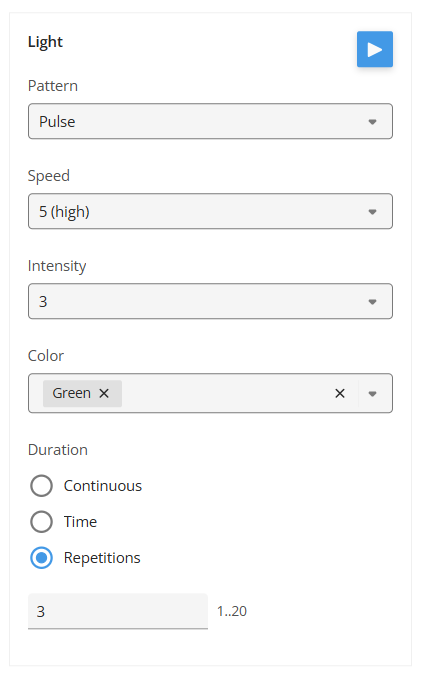
Setting up an action in Peripass
Once you have selected a trigger you wish to be notified of, the steps below will guide you through setting up an Axis D4100 action.
Go to Actions.
Add a new action.
Select “Execute an API call - on a local server” and fill in the information below.
The URL is: http://<Insert IP adress>/axis-cgi/siren_and_light.cgi
Use a POST Method.
Data should be (Text between <> needs to be replaced):
- CODE
{
  "apiVersion": "1.0",
  "method": "<start/stop>",
  "params": {
     "profile" : "<Insert name of the profile you wish to execute when triggered>"
     }
}
In the Authentication dropdown, select “Other - specify in header/url”.
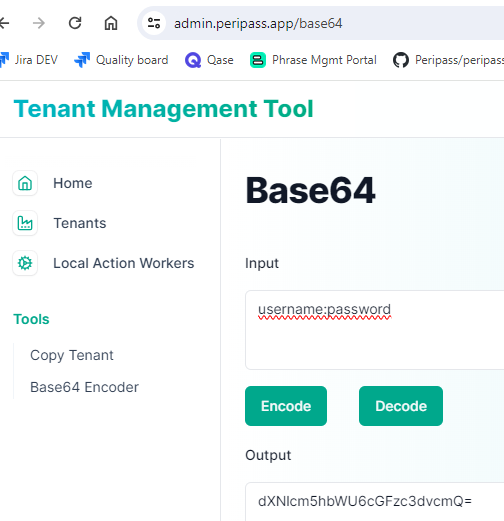
Under Headers the first box should simply contain “Authorization” and the second box “Basic” followed by a space and your unique Base64 encoded string. Use our internal encoder for this: https://dev-admin.peripass.app/base64
Input: <username>:<password>
Use the generated output as value your “Authorization” header in the format Basic <output>
eg. : Basic dXNlcm5hbWU6cGFzc3dvcmQ=
Best practice implementation
Create a visible process step to control the event alerter as a backup. This way, dispatchers can also control the event alerter in other situations not controlled by triggers & actions.
Use 3 different steps in the following order: “---”, “Turn event alerter on” & “Turn event alerter off”. The first step is the default and makes sure the event alerter is not activated every time a visitor is created.
Additionally, create a trigger & action that automatically returns the process step to its default “---” state in order to not have to manually reset it.

