
Dock sensors
When do you need this
Whenever you need to know the individual status of a dock fast and accurate. Typical examples are:
When you have loading locations on the public domain, and you want to verify whether a visitor has arrived on this dock.
When you have limited dock capacity and you want to be able to dispatch a new visitor the minute a dock becomes available.
When you have a large site and there is a long distance between barrier entry and the dock location.
Main idea
Change onsite / offsite status of a visitor based on the status change of a dock (using triggers & actions)
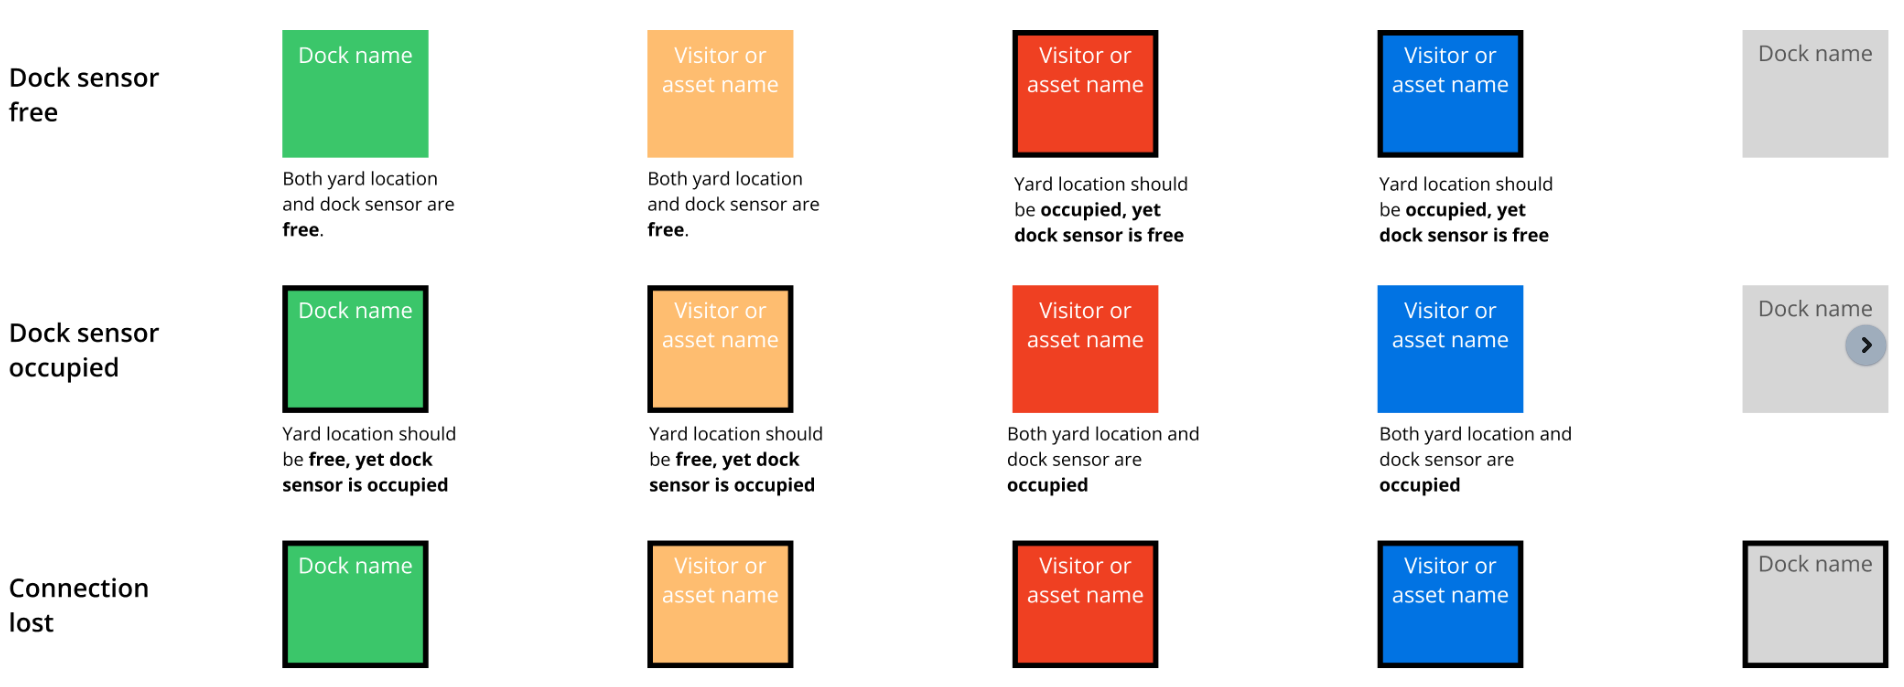
Visual indicators when your attention is required. Mainly:
When a free yard location has an occupied dock sensor
When an occupied yard location has a free dock sensor
When the dock sensor is not shown
Thus when there is no dock sensor indication on your yard, you can assume everything is working fine.
Dock sensor status changes only result in triggers when they are constant for 30-120 seconds (avoid false triggers due to truck manoeuvring back and forth while parking). For the new nwave sensors this is configurable.
Setup principle:
Won’t do
Timed warnings (e.g. alert when visitor does not arrive to dock after 10 minutes)
Incorrect docking detection (e.g. visitor X probably parked on Dock A instead of Dock B )
States & visualisation
Dock sensors or Wheel-blockers can be used to reflect the dock occupancy (Occupied or Free).
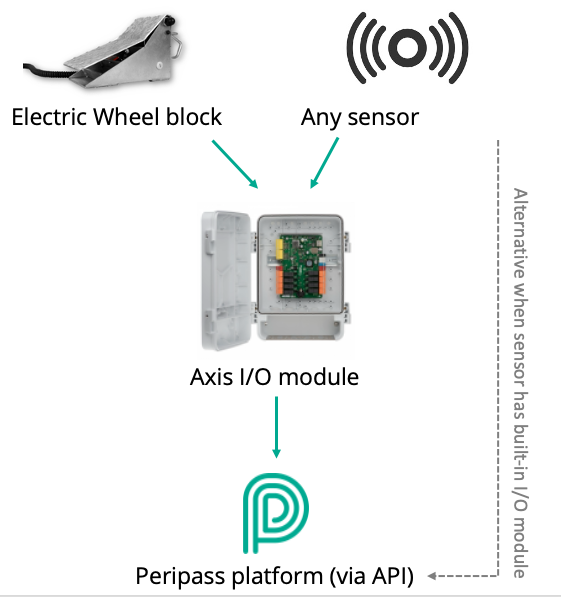
How to set up
Link the wheel blocks or sensor to an Axis module input. When the wheel block is placed or removed, it should open/close the input on the Axis module.
Configure the axis module to send a http request when the input is changed.
Use the following API to https call to Peripass: https://docksensors.peripass.app/api/swagger/ui#/Webhooks/WebhoookEventSubscriptionFunction
Set sensorstate occupied when the input signal indicated the sensor is occupied and vice versa.
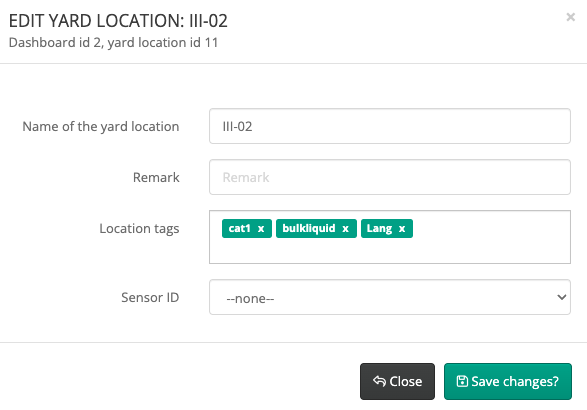
Dashboard id and location id are shown in Peripass when editing a yard location.
Contact support to receive a passphrase.
The “delayInSeconds” will determine how long a status needs to be stable before it is accepted by Peripass. If configured to short, it might trigger an exit process while the driver is actually manoeuvring back and forth in order to get parked. We advise to have this set to 30 seconds.
Legacy dock sensors
Using Nwave sensors 2023-2024
Nwave dock sensors are end of life
This documentation is only for supporting older dock sensors.
Login in the Nwave console: https://d.nwave.io/
Erik will have created a project and a zone for your customer and your site. Do not change this.
Create a group for each dispatch dashboard you are using:
Go to Device Management > Groups: add a group with the following information:
Group name = same name as your dispatch dashboard
Group type = Marked spaces
Zone = the zone that has the same name as your site
Level = No level
Custom id = the id of your dispatch dashboard. You can find the ID when editing a yard location
Then link each device to a yard location
Go to Device Management > Devices.
Here, click on the device ID of the device you want to configure: on the right side
Group: choose the dispatch dashboard to which the device belongs
Custom ID: Change this Custom ID to the yard location ID of your dock in Peripass (you can find this ID when editing a yard location
Then configure an API call to Peripass on every dock sensor status change
Click the hamburger menu in the top left corner and click HTTP under API & Data.
Open the Template Suites option.
Click the + button to create a new template suite. Name it like this:
CUSTOMER NAME :SITE NAME
Example: Reynaers: Duffel
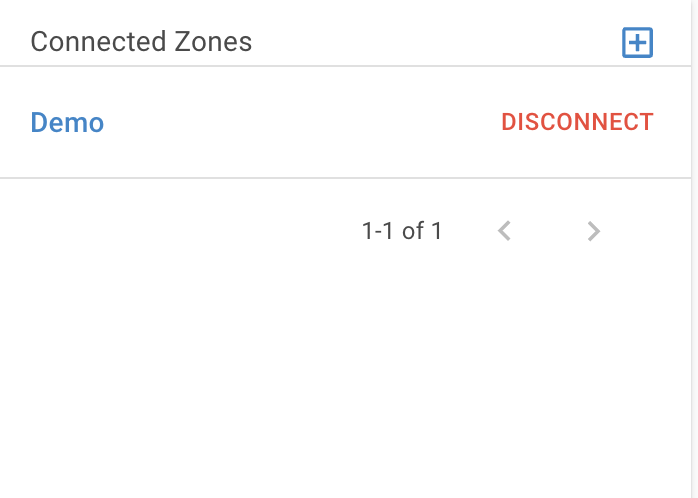
The following screen will open:
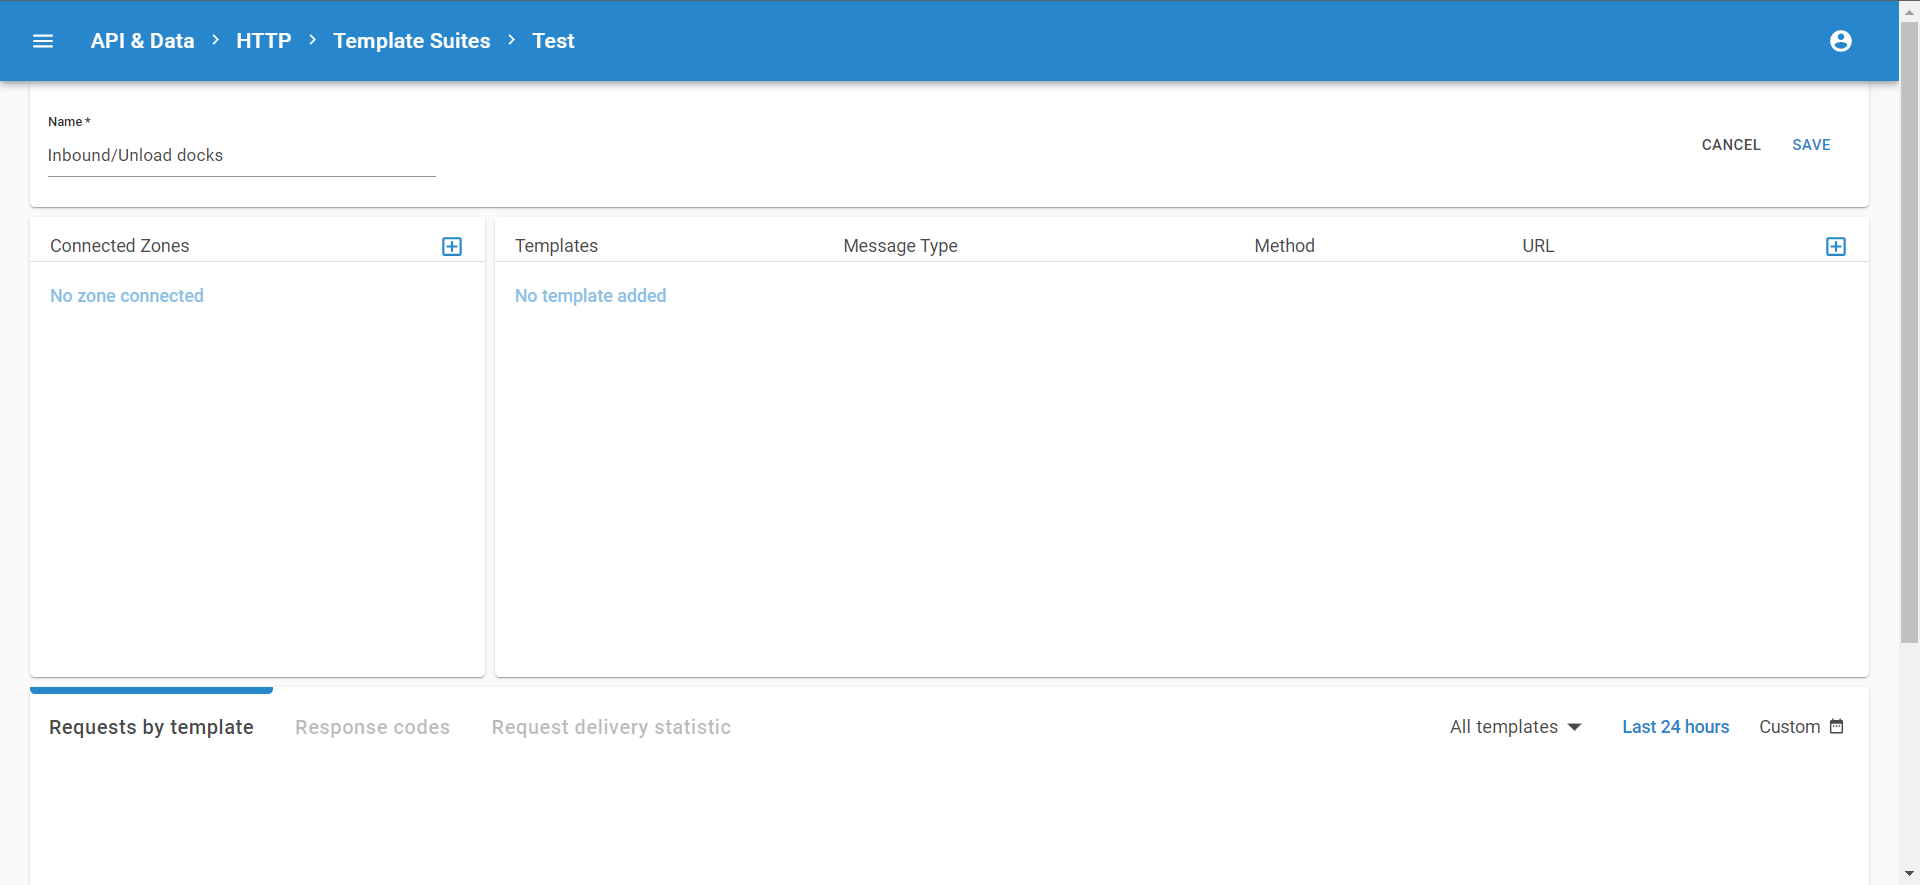
Next to Connected Zones, click the + button and connect the zone linked to the site your are configuring sensors for. This should look like this:
On the right hand side of your screen next to URL, click the + button to add a new template that will send an API message to Peripass.
Choose Create manually.
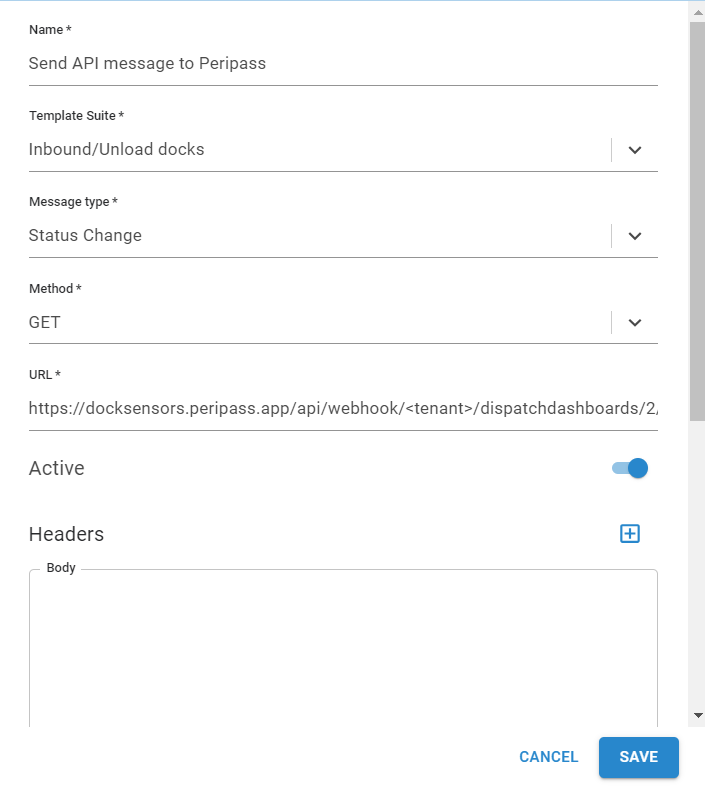
Your configuration should look like this:
Name: “Send API message to Peripass”
Template suite: select the suite you just created
Message type: status change
Method: GET
URL: (text between <> should be replaced): https://docksensors.peripass.app/api/webhook/<tenant>/dispatchdashboards/{group_custom_id}/locations/{custom_id}/sensor/{("Occupied") if parsed["occupation_status"] is True else ("Free")}?delayInSeconds=30&passphrase=<passphrase>
Be aware: the “delayInSeconds” will determine how long a status needs to be stable before it is accepted by Peripass. If configured to short, it might trigger an exit process while the driver is actually manoeuvring back and forth in order to get parked. We advise to have this set to 30 seconds.
Important to note is that this only has to be done once for each site you have, not per sensor. In the first step, we ensured that each dock sensor will send this message to the dispatch dashboard (using custom group ID), in the second step we ensured the message will be send to the right dock on your virtual yard (using custom ID).
Using Nedap dock sensors 2020-2022
Nedap dock sensors are end of life
This documentation is only for supporting older dock sensors. Look at the Nwave documentation for the latest instructions on new sensors.
Ask your Nedap partner to provide you with API credentials and an API url
The api url looks like this: https://pp-prd.nedapparking.com:443/api/v1
Fill in the url and credentials :Configuration: Configuration > :Dock_sensors: Dock sensors. Peripass will automatically update you to the newest version.